Quantcast
Channel: Gearhead: Reviews – Ming Thein | Photographer
Viewing all 188 articles
Browse latest View live

Project: Creating a multispectral camera

$
0
0

_5015948 copy

Those of you who also follow the site’s Facebook page will have noticed some images posted of late by a mystery camera, one un-purchaseable, and un-available to the general public. (And no, it’s not the new Leica M 240 or a Hasselblad Lunar.) You’ve oohed and ahh’d at the tonality, and wondered why the output was solely monochromatic. Several people speculated that it might even be from a Phase One Achromatic medium format back! The camera is in fact a Sony NEX-5, with the kit lens. The images you saw were almost un-processed; just shot RAW and desaturated.

Sometimes, I get donated photography-related things by generous readers. One of the more generous things I’ve received was this cameras: mint, almost-new-in-the-box and hardly used. Originally, the donor suggested I run a competition to give it away; though a generous offer, I’m pretty sure the camera wouldn’t interest too many of my readers – being nearly three years old and all. So, I hatched a plan: why not make it into something a little more interesting? I’ve been paying a lot of attention to black and white tonality both in the past, and of late in conjunction with my serious re-exploration of film; there’s something about the way film responds that gives it wonderful quarter and three-quarter tones. The look is achievable in digital, but it requires a lot of post processing simply because sensors do not natively respond to light in that fashion.

_N5MT_DSC0112 copy

The why

In fact, almost all sensors are optimised for accuracy of colour reproduction in the visible spectrum; this is a quantitative, tangible thing that can be done through measurement and iteration. It’s fairly consistent: accurate colour is the way most of us perceive things, to within the limits of our output media. Black and white, on the other hand, is hugely subjective: some people like mega grain and huge contrast with no midtones, others won’t settle for anything less than an over-HDR’ed mess that’s all mid tone and not much else. Personally, I’m a big fan of Ansel; it’s just that it requires a lot of work and careful exposure to achieve. But what if you could have a camera that made wonderful B&W images without much work, and better yet, had a bit more sharpness and sensitivity to boot?

Returning once again to the rationale for me shooting film – more upfront thinking, less work, something in the tones – I decided to see if such tonality was really possible natively out of a digital camera. I recall the Leica M8 creating raw files which were excellent candidates for B&W conversion because of their luminous quarter tones – this was thanks to the camera’s weak native IR filtration. These files too required some work, but not as much as heavily-filtered cameras. I wondered if there was something of a nugget here. Not only would you get more luminous blacks, you’d probably get a bit of a sensitivity boost, too – given that the sensor would be seeing light in UV, IR and the visible spectra.

_N5MT_DSC0128 copy

The how

Infrared, and to a lesser extent, ultraviolet, photography have been done for some time. There are companies out there which offer (not cheap!) conversions to either or both; there are even companies which offer services removing the anti-aliasing filter – though oddly, not both. But to create what I envisioned as the ultimate black and white camera*, all of this would have to go: no UV or IR filters, no AA filter. Just bare naked sensor. After several days of monkeying around with dozens of tiny ribbon connectors, and breaking one (caveat: the camera of course still works, but that connector will never be able to be opened/ released again) and nerve-wracking moments with various sharp implements, I’m pleased to report that this particular Sony NEX-5 has no filtration at all in front of the sensor, except for the Bayer filter, which is part of the sensor itself and thus cannot be removed. It’s about as close as you’re going to get to bare silicon – in fact, what you see when you take the lens off is the bare silicon of the sensor surface. Note that silicon is a very hard material – it’s used in portions of mechanical watches that require extreme precision and zero lubrication, and move/ interact against other parts at 8Hz or higher (the escapement) – but I still wouldn’t recommend touching it. This sensor has been properly cleaned, but may have a small dust bunny or two on it from swapping lenses. Use a blower.

*I admit I was disappointed when I learned that the Leica M-Monochrom retained its UV and IR filtration, but it turns out that decision actually makes a lot of sense, as does the 50/2 APO-Summicron – I’ll explain why later.

_5015962 copy
What you don’t see in this shot are the hundreds of little screws, connectors and oddly-shaped parts that somehow go mesh together neatly to hold things in.

The NEX-5 is a very densely packed camera indeed; there isn’t a single cubic centimetre of free internal space for any additional components. For the most part, it’s quite well designed, and there are even some bits that are quite over-engineered. Some of the connectors are incredibly tiny indeed; I wonder how long it takes them to assemble one of these things. The first time I took it apart, it was a very cautious three hours – about an hour for reassembly. By the third time**, we were down to fifteen minutes in-and-out. The machining tolerances for this thing must be extremely tight indeed: not only are there no shims in the mount, but there are only (thankfully) three very small washers between the sensor board and the main frame of the camera itself, which is magnesium. The lens mount bolts directly to the other side of this – it doesn’t really get a lot more rigid.

_5015963 copy
UVIR and AA filter pack, removed. Also, damaged – they used some insane glue to stick it to the sensor frame.

**The reason why it took three tries at all was because the camera didn’t work after the first one; it turns out I forgot a very small ribbon cable that got trapped under the main board which controlled the shutter timing. The third time was to do with focusing: the rather thick (nearly 1.5mm) filter pack was glued to the sensor heat sink frame with some very tenacious adhesive. What I didn’t realise was that this component was part of the optical formula of the system, and the lenses do not have enough additional focus travel to deal with the missing bit of glass; as a result, it was impossible to achieve infinity focus. The solution was to move the sensor closer to the mount; and here I’m thankful that there were those three little washers between sensor and internal frame, because if there wasn’t, then we’d have a serious problem – the Sony engineers did not provision a way to reposition the sensor (they must have been pretty confident of alignment and machining tolerances). Curiously, those washers were precisely the optical thickness of the filter pack (it’s almost as though they intended for something like this to be done), and the camera now focuses to infinity with all lenses.

_N5MT_DSC0121 copy

Results, notes and cautions

I’m going to be blunt here: the camera doesn’t hit full marks across the board. From a tonal viewpoint, the results are fantastic – just shoot raw and desaturate, and that’s all you have to do for almost every situation. All of the images in this post have had almost no work done on them at all – just desaturate. They came out of the camera 99% there, with this wonderfully filmic quality – even at high ISO. Is the more dynamic range? Not really. Skin tones are smooth yet delicately textured; deep shadows have that glow thanks to IR reflectance; and the detail is definitely better than a standard camera – I owned one for several months, and never saw this degree of sharpness. I wouldn’t use JPEG though, simply because it doesn’t retain as much information as the RAWs, and this will certainly affect tonal subtlety and resolution, to a lesser extent.

_N5MT_DSC0100 copy

Yet where the camera falls down is also resolution: it’s not because of the sensor; in the centre of the frame, there’s clearly a great degree of fine detail. The edges, however, look like crap. (Bear in mind the only E-mount glass I have now is the kit lens that’s bundled with the camera.) This is not because of the sensor: it’s because of the lens, which although it resolves quite well in the visible spectrum, is clearly nowhere near apochromatic enough in the corners; they look like a smeary mess in some cases. The smearing is caused by UV and IR spectrum image forming rays from the subject – cut out by the filter pack, normally – being registered on the sensor at a different physical location to visible light. There is still more visible light, of course, which means that focus is mostly where autofocus puts it, but not for all subjects – warm subjects in low ambient light – people indoors, for instance – tend to be a little back-focused because of this. Outdoors, things are fine (visible light > IR again).

_N5MT_DSC0049 copy

Results are better at the telephoto end of the zoom, stopped down, and of course with better glass. I’ve got a few adaptors lying around from my NEX days; unfortunately they’re discount Chinese items off ebay, and they perform as you would expect: crap. My M-adaptor doesn’t focus close up and has planarity issues; my F adaptor won’t focus past a couple of meters. (It would seem that their tolerances aren’t enough to deal with short flange systems.)

In my preliminary testing, the Zeiss ZF.2 2/50 Makro-Planar, ZF.2 2.8/21 Distagon and ZF.2 2/28 Distagon are all excellent performers – even into the corners. Surprisingly, the old Noct-Nikkor does very, very well from f2 onwards, and is quite passable with a little IR-induced glow even at f1.2. The Nikon 85/2.8 PCE and 45/2.8 P are also excellent, even if the former is rather impractical because of its tight focusing helicoid and inability to be stopped down without electrons. You’re probably wondering about the M-mount glass: forget the wides, they’re lousy on any mirrorless camera not optimised for them (i.e. anything that isn’t a digital Leica M). I don’t have anything telephoto. I suspect the 50/2 APO ASPH would be the lens to use on this camera, with its true optical potential seen outside the visible spectrum; and now it makes perfect sense why the Leica M-Monochrom retained its UV and IR filtration: without it, the other lenses – especially older wides – would appear very soft indeed, thanks to their property of focusing non-visible light at a different distance to visible light.

_N5MT_DSC0134bw copy

So how would I describe the tonal characteristics of this camera? In a nutshell, it produces B&Ws that are warm and rounded, if there’s such a thing. The sharpness is there but it’s not biting; the tones are rich and deep. If used with better glass, I think it would really sing – especially for portraiture. Skin looks baby-soft. Don’t use it in colour, it looks horrible due to pollution of the blue and red channels by UV and IR respectively. However, note that with a visible blocking filter over the lens, you could shoot either IR or UV without issue. The camera also gains some sensitivity – about 1-1.5 stops depending on the situation – because of the extra light it’s collecting. With the right filters, it might be an interesting tool for astrophotographers or voyeurs, for instance. Of course, you can always use one of the B&W or Leica UVIR filters and then have a regular NEX-5 again, but this time without the anti-aliasing filter.

An interesting experiment? Undoubtedly. Would I do it again, with a more interesting camera, better sensor, and something I have better glass for? Sure, why not? Though I think mirrorless makes an ideal candidate because a) you don’t have to mess around with a mechanically complex camera, and the attending realignment issues associated with disassembly (mirror, AF system etc.); b) the LCD/ EVF gives a great live B&W preview, so it makes it easier to visualise how the results will appear after conversion – the colours really are pretty funky – and c) these are just cheaper to experiment with.

Now, if somebody would like to donate a D800E to the cause, I think some very interesting results might ensue…in all seriousness though, if anybody would like to donate a camera to be experimented on (you will of course get it back afterwards, but no guarantees that it can be done) then please send me an email. MT

Note: We’re still giving this camera away. Tomorrow, I’m going to explain how – there will of course be a photographic competition involved! Update: Full details on how to enter here.

Coda: since I was asked by a couple of people over email and in the comments, here’s how the color images out of the camera look: heavy pink-magenta casts due to IR and UV pollution in the red and blue channels respectively. I suppose some (of the hipstagram persuasion) might like the look…

_N5MT_DSC0208 copy

_N5MT_DSC0128 copy

____________

Visit our Teaching Store to up your photographic game – including Photoshop Workflow DVDs and customized Email School of Photography; or go mobile with the Photography Compendium for iPad. You can also get your gear from B&H and Amazon. Prices are the same as normal, however a small portion of your purchase value is referred back to me. Thanks!

Don’t forget to like us on Facebook and join the reader Flickr group!

appstorebadge

Images and content copyright Ming Thein | mingthein.com 2012 onwards. All rights reserved


Filed under: Articles, Gearhead: Reviews, On Photography

Film diaries: medium format revisited, with the Hasselblad 501C

$
0
0

_8025831bw copy

Many of you might remember my earlier serious revaluation of medium format photography (article here) – and the conclusion I reached from a couple of months ago, which was that whilst there was a slight but noticeable gain in image quality, it simply didn’t work for me – not only would the solution for my regular commercial subjects be rather clunky and impractical. For my personal work, it didn’t feel different enough from shooting FX digital to force me to think different; in fact, the slow AF and generally sluggish UI made me frustrated. You’ll probably also recall that I very briefly evaluated the CF-V 39 back for the V series and quickly abandoned it because somehow it just left me confused – “…somewhere between the combination of the multiple crop lines, the left0-right inversion and everything else that was different, my brain shut down. I just couldn’t see anything other than what should have fit into the square 6×6 frame…”. Logically, this shouldn’t have been the case, given that rangefinders have far more confusing framelines, and any DSLR has a maze of AF boxes and grids and the rest inside the finder. But it did, and I summarily ruled out shooting with any of the V-series cameras.

_8025998bw copy

This actually wasn’t my first experience with the V-series. Many, many years ago, one of my students acquired a 503 and CFV-16; I played with it briefly and found that to be equally frustrating and counterintuitive. (I also remember the back just shutting down and refusing to cooperate at one point, too.) It didn’t leave much of an impression, and certainly not a positive one.

Yet somehow despite all of this, I seem to have performed an abrupt 180 degree turn in the last couple of months. I acquired a rather nice 501C, which according to its serial number, is around 17 years old. For some irrational reason – and that’s the only thing I can put it down to – I am taking to this camera in a way that I certainly didn’t with the others. It doesn’t feel counterintuitive. It doesn’t feel finnicky or fragile. And it certainly isn’t confusing. Unlike the others, it makes me want to go out and shoot; it’s also got me seeing square compositions, which I certainly didn’t do before. In fact, I like working with it so much – and of course the results it produces – that I’ve also ordered a second back and 50/4 Distagon FLE, and the 120/4 Makro-Planar to complete the kit.

_8025994bw copy

The obvious question is of course, what changed?

I’m not entirely sure myself. Other than that perhaps the shooting experience is different enough to give me the kick I was looking for; the basic controls are all still there, in a logical layout, without so many quirks that you go mad trying to remember them. Don’t get me wrong: using a V-series Hasselblad is still very much an exercise in masochism; your finder is reversed, the focus throw is extremely long, you only get 12 shots per roll (24 if you can find an A24 back and 220 film) and your shutter speed tops out at just 1/500s. Not to mention little quirks like having to remember to cock the shutter before mounting or unmounting lenses to avoid breaking the leaf shutter drive shaft, or putting the dark slide in before changing backs/ taking it out before shooting, the oddly positioned shutter release etc. And let’s not even talk about how fiddly it is to load the backs in the first place*. Somehow, the experience works for me.

*That said, unlike my first film Leica M, I managed to load it properly and not get a blank roll at the other end. I think I was just more careful this time.

It also helps that the experience is a pleasantly tactile one. ‘Serious’ cameras from the film era were built like the proverbial brick outhouse; the choice of materials and attention to detail made them objects to last, and objects that were enjoyable to use and handle. If you’re holding your camera for hours on end every day, believe me, this matters; that little, rattly, cheap-feeling plastic switch can drive you nuts after a while. The 501C, on the other hand, is every gram a real camera with a feel that is unmatched by just about every modern piece of gear, excepting perhaps the Leicas and Zeiss lenses – certainly not anything from a mass manufacturer. Historically, the cost of these things was non-trivial, and it certainly shows. What I do find amazing is that a very, very good condition complete outfit can be acquired for around the same cost as a midrange prosumer DSLR – yet I still get comments from people fawning over it as though it’s a Bugatti.

_8025990bw copy

I suspect the latter may be as much to do with the perceived (historical) costs of entry, as much as the masochism required to pilot one well which results in quite a large psychological barrier overall. I personally have no issue with meterless cameras, or manual focus; I’m training my eyes to be a light meter, and for the most part, I’m within about a stop of the intended exposure. For commercial flash work, it’s usually manual through a mix of experience and quick guide number calculations. It’s actually quite liberating to be in full control of the outcome and not have to second-guess whether the camera is going to give you what you want or not.

There are also some very clever things I like about the V system: firstly, the ability to change backs mid-roll means that you can carry a high ISO back and a low ISO back, and not waste film or miss shots. The lenses are calibrated so that turning both shutter and aperture rings in the same direction by the same number of stops maintains a certain EV exposure; most of the CF lenses even have a coupling button to lock the rings together. Not letting you take out the back without a dark slide in place (and blocking the shutter if it is in place) makes sense too, if you think about it: you don’t want to accidentally waste a frame. You can also easily interchange finders and focusing screens; later cameras also take winder grips and motor drives.

_8025992bw copy

With film, the shooting experience is only half the story. To control the output completely, you also have to develop and scan your own (assuming your output is digital rather than print). I’m still refining my process for both, so I’ll refrain from commenting too much on that for now; suffice to say that the grain is a bit large for my taste, probably because tap water here is 27 C and far too warm for slow development. As for the scanning process – I’m using a single-shot capture from a D800E and Zeiss 2/50 Makro-Planar, duplicating the negatives sandwiched between glass for flatness. The tonality and conversion process definitely needs some refinement, too.

It seems like a lot of work – and it is – but I am enjoying the process. And all up, I don’t think I’m spending much (if any) more time than I would with a digital workflow – I have fewer, but better, images to work on; the conversion process after scanning is largely written up as a macro, so I don’t have to do anything other than load my files, crop, dust spot and press a button; there is no curve or dodge and burn work involved anywhere. If I wanted that level of control and cleanliness, I’d use the D800E. That said, if they did ever offer a ‘full 6×6′ (or close to it) digital back, I’d probably mortgage a kidney and buy one. I could see myself using this thing commercially if throughput and control were faster and more consistent.

_8025987bw copy

In short: so far, so good. I’d highly, highly recommend the experience if you have any interest in shooting film, or trying something different – the best thing about it is that if you don’t like it, you can resell the camera for pretty much what you paid for it. If you do like it – I did the economics – I’d have to shoot 25,000 frames with my complete (two lenses, two backs, two finders, including film and chemical cost) 501C setup to equal the cost of a new H4D-40. And there’s no way I’d be shooting in such quantity with either camera – I have other workhorses for that. More thoughts to come soon. MT

____________

Visit our Teaching Store to up your photographic game – including Photoshop Workflow DVDs and customized Email School of Photography; or go mobile with the Photography Compendium for iPad. You can also get your gear from B&H and Amazon. Prices are the same as normal, however a small portion of your purchase value is referred back to me. Thanks!

Don’t forget to like us on Facebook and join the reader Flickr group!

appstorebadge

Images and content copyright Ming Thein | mingthein.com 2012 onwards. All rights reserved


Filed under: Film Diaries, Gearhead: Reviews, On Photography

Film diaries: A quick introduction to Hasselblad V-series cameras

$
0
0

_5015926 copy

Since acquiring and shooting with my 501C, a lot of my readers, students and photography friends have been asking for more information about these beauties. I certainly don’t claim to have the depth of knowledge of some of the longer-lived collectors or photographers, but what follows is a (hopefully) handy collation of what I do know, from the point of view of the practical photographer.

The Hasselblad V series is a system camera: that’s to say that lenses, bodies, finders, backs and other general accessories are interchangeable. The body contains the reflex mirror, film winding mechanism and secondary shutter only, plus a way of triggering and rewinding the leaf shutter in the lens, of course. Lenses of various vintages can be used on all bodies, with varying degrees of functionality. Flash sync terminals – PC sync – are in the lens, since this is triggered mechanically by the leaf shutter. Several types of backs are available, including digital and polaroid (rare) options; the same goes for finders. The ‘classic’ configuration is an 80/2.8 lens, collapsible waist level finder and A12 film back.

Bodies
Generally, for a shooter, you want to look at buy the 500-series (also known as the V series; includes 500, 500C, 500C/M, 501, 501C, 501C/M, 503CW, 503CX etc). The C means that it uses C-mount lenses which have built in Copal leaf shutters; anything with /M means upgraded/ modified. The bodies contain the mirror, winding mechanism, and a secondary shutter to prevent light leaks. A nice user is better than a safe queen that’s never been exercised, because you must remember the whole thing is mechanical. Later versions have meters and electronic coupling. I would go for either a 501 or 503 of some description; the 500s are older. Mine is a 501C and dates to 1995. The electronic 553 and 555 bodies have built in motor drives, but are bulky and eat batteries for breakfast. I think fully mechanical is the way to go; partially because of long-term reliability (gears can be fixed; small-volume electronics is often unrepairable without spares). There are also tilt shift bodies (ArcBody and FlexBody), and a super wide viewfinder camera – the 900 series (903 SWC, 905 SWC and earlier SWC and SWC/M), which has a fixed 38/4 Biogon but takes standard backs.

When testing a body, the winding action should have some springy resistance, and the shutter action should be snappy – the mirror should get out of the way fast, and stay there; same goes for the secondary shutter curtains at the rear of the body. Note that the mirror doesn’t come down again until the camera is rewound. You can check mirror alignment by turning the lens all the way to infinity: find a suitably distant subject and check that it is indeed in focus with the magnifier. (The lenses have hard infinity stops.) Needless to say, there should be no loose or rattling parts inside. Check also that the lens drive shaft on the mount turns when you release the shutter and wind the crank, and that the vertical gear on the right also winds with the crank – this advances the film. Finally, the little lever that protrudes from the body on the bottom right where the back mounts should also be sharp and not worn – this advances the film status indicator.

_5015921bw copy

Related bodies
The ArcBody and FlexBody are two V-mount bodies that also take the same A-series backs and accessories (but not finders); these have bellows or bags in the middle that permit some technical camera movements; noticeably shifts and tilts. In some ways, they’re miniature view cameras. The ArcBody is primarily geared towards shifts; it has its own accompanying set of Rodenstock lenses and is ideal for architectural work. The FlexBody is mainly for tilts, and DOF control/ product photography or landscape. Personally, if I do move over to medium format for my work, I’d be looking at one of these – they also accept digital backs. Note that both are relatively uncommon and seriously expensive.

Lenses
The type you want to go with the V series are C T*, CF T*, CFE T* or CFI T* lenses. The earlier C (non T*, i.e. no fancy coating) lenses work too; they’re cheap but low contrast and relatively high flare. The T* lenses denote optics with the Zeiss T* coating – their rendition and performance is much like the modern ZF.2 series. They all also have long back focus distances, so you can mount them on your SLRs too – though the resolving power may not be as high as the latest 35mm optics.

CF lenses are the best bang for the buck. They have coupled aperture/shutter speed rings (with the exception of the 80/2.8 CF T*) and upgraded shutter mechanisms; CFE and CFI lenses are later models with electronic coupling and are several times more expensive than CF, often for no particularly good reason. The bodies almost always come with the standard 80mm – it has a similar diagonal FOV as a 50mm on 35mm, but you have to remember it’s a little bit different because you’re comparing square to 3:2 aspect ratios. The good lenses – all CF or higher – are the 40/4 Distagon FLE, the 50/4 Distagon FLE, the 80/2.8 Planar, 120/4 Makro-Planar and 180/4 Planar. These are roughly 25, 30, 50, 75 and 120 equivalents. The FLE lenses have a separate correction ring for optimising close-range performance.

Note that the tip of one of the shutter blades may appear bent in the lens; this is a design feature to prevent catching at high shutter speeds. The shutter action of a lens should be snappy and crisp; the slower speeds tend to be where there are problems, so it can be beneficial to test the 1/2 and 1 second speeds with a stopwatch to get an idea if they’re roughly within spec. A slightly metallic noise when changing shutter speeds is normal, especially if you are traversing large ranges of shutter speeds – this is just the internal springs changing tension. Be very, very vigilant for broken drive shafts – these cost a fortune to fix!

One final note on lenses: they require bayonet filter adaptors (designated B-something) which allow you to mount standard screw-in filters. I suppose this is for ease of changing in case the threads get munched up, but it can be a pain if you’ve lost the bayonet ring. Fortunately, they take mostly standard sizes – except for the 4/40 Distagon, which requires an enormous 93mm (!!) filter.

_5015930bw copy

Backs
Three kinds: A12, A16 and A24. The number denotes # of shots; A12 and A16 work with 120 film, and A24 works with thinner 220 film; it has no paper backing for twice the number of shots. Note however you can’t buy 220 film here anymore, so it’s kinda useless – don’t buy an A24. You can load 120 film into an A24, but the difference in length means that it won’t wind or count frames properly. Just avoid it. The A12 is the standard back and gives 12 6×6 shots on a 120 roll. The A16 is a 645 back that gives 16 shots per 120 roll, but requires a separate viewfinder mask to show only the 645 film area – this should be included if you plan to buy an A16. Note that it’s not very practical because shooting a waist level finder in portrait orientation is nearly impossible. Backs should come with dark slides – the little piece of metal that goes between body and back – if you don’t have this, you can’t detach the back. It’s to prevent light leaks when interchanging backs – the ability to do this mid-roll is one of the huge strengths of the system. Buy multiple backs to make the most of this. Note: some sellers will note ‘matching numbers’ which means the roller mechanism inside’s serial # matches the housing – it doesn’t make any functional difference, but it does seems to affect prices quite a bit. If you’re going to use it and not collect it, it doesn’t matter.

You might see something called a ‘Lindahl dark slide holder’ mentioned – this is a clip on that goes on the back of the back (really) that holds your dark slide while you’re shooting. It’s functionally useful, but I personally think it looks ugly because it spoils the lines of the camera. A better solution is just to tuck the dark slide into your wallet.

There are also many digital options, both from Hasselblad (the CFV series backs) and other manufacturers. Note that none of them make a true 6×6 back; there’s always some crop factor involved. The earlier CFV and Phase backs did have square sensors, but these were 1.5x crop, 37x37mm affairs that were much like using FX lenses on a DX body. The newer backs – CFV-39 and CFV-50 – use 645 aspect ratio sensors in a 1.1x horizontal crop, and a 1.5x square crop. They are accompanied by viewfinder masks that I personally find very confusing – much like trying to compose with an overlaid tennis court. Note that some backs have sync issues with purely mechanical triggering, especially if your shutter mechanism is a bit worn. The solution is to use the PC sync cable off the lens to synchronise it with the back, but this can result in issues like worn terminals from frequent lens changes, and lack of anywhere to hook up your flash.

_5015925bw copy

Finders
There are two kinds: prism and waist level. Waist level is the collapsible, left-right reversed type with a built in magnifier. It’s the standard finder. Prism finders come in metered (PME-x) flavours and unmetered flavours (PM3, PM5). It’s basically an enormous SLR finder, but in 45 degree and 90 degree (the later PME-90) flavours. They’re all interchangeable, once you take the back off. Note that the prisms are meters only, and do not transfer the settings to the camera – you still have to do that manually.

Metering
Unless you have a metered finder, the cameras are fully manual and unmetered. This means using a trained eyeball, or getting a meter prism; otherwise, the simplest solution is to use a compact camera in aperture priority mode with spot meter set. Match apertures and ISO, then transfer the shutter speed reading to the lens. Important note: if you’re using a compact, I’ve found that the Hasselblad requires half a stop to a stop less shutter speed than the compact for the same exposure (i.e. if the compact reads 1/100s, the ‘blad will use 1/150-1/200s). This is partially due to the tonal response characteristics of film, and partially due to the transmission properties of the lens: T* coated V lenses have a T stop very close to their physical F stop, whereas compacts usually don’t because of inferior coatings or complex designs with large numbers of elements.

Pricing
This is perhaps the most sensitive/ subjective topic here, but to give you an idea – a solid user condition 500CM, waist level finder, 80/2.8 CF T* or C T* and A12 back should run under a US$1,000. Price varies depending on variant and condition, of course. Later models like the 503 series will of course cost more – sometimes considerably so. That said, I still find it pretty amazing that you can buy a camera of this quality at little more than the price of a consumer DSLR kit – and you can be sure that the ‘Blad will outlast you, and probably your children. I don’t know what happened to the millions of 300D Digital Rebels they made, but I suspect that most bit the dust a long time ago.

Important notes:

  • The shutter should be stored in a cocked state, i.e. wind the back after every shot.
  • VERY IMPORTANT: DO NOT MOUNT OR UNMOUNT THE LENS IF THE SHUTTER IS NOT COCKED. The drive shaft for the lens (to cock the leaf shutter in the lens) can break if it is not in the correct orientation.
  • The dark slide needs to be inserted before removing the back
  • The dark slide needs to be removed before shooting (shutter button is blocked)
  • When you shoot, hold down the shutter button – do not release it immediately after pressing. The secondary curtains in the body only stay open as long as the button is held down.
  • Don’t lose or bend your dark slides; you won’t be able to insert them, and without the dark slide in, you can’t remove the back, and there’s nothing to block the shutter from firing accidentally in a bag. Get spares, if you can.
  • Always wind the camera before attaching a back – if not, when you wind it, you’ll lose a frame. The right procedure for assembling a camera is 1. wind body; 2. attach lens (check that the little slot in the lens’ mount lines up with the dot, if it doesn’t, use a coin or screwdriver to turn it in the direction of the arrow – this is to cock the lens shutter); 3. slide in finder of choice; 4. load and attach back – this is a whole separate section on its own.

I’m now wondering how many of you are going to give it a try…MT

____________

Enter the January 2012 black and white challenge – win a multispectral Sony NEX-5 B&W machine modified by yours truly!

If you enjoyed this post, please consider supporting me via Paypal (mingthein2@gmail.com). Visit our Teaching Store to up your photographic game – including Photoshop Workflow DVDs and customized Email School of Photography; or go mobile with the Photography Compendium for iPadYou can also get your gear from Amazon.comhere. Prices are the same as normal, however a small portion of your purchase value is referred back to me. Thanks!

Don’t forget to like us on Facebook and join the reader Flickr group!

appstorebadge

Images and content copyright Ming Thein | mingthein.com 2012 onwards. All rights reserved


Filed under: Film Diaries, Gearhead: Reviews

Lens review: The Nikon AFS 60/2.8 G Micro

$
0
0

_8015826 copy

In what appears to be a hideously enormous oversight on my part, I seem to have neglected to review what is ostensibly my most used lens: the Nikon AFS 60mm f2.8 G Micro-Nikkor. As you might expect, I use this lens for the majority of my commercial watch photography. I prefer it over the 85 PCE for images that require high magnification, as this lens natively reaches 1:1 magnification on its own; thus requiring fewer extension tubes to reach even smaller levels of frame coverage.

_8015235 copy
Nitro Experiment One

Before we start talking about the lens specifically, I would like to debunk some myths about macro vs micro photography: both have to do with the reproduction ratio created by the lens on the imaging medium; it is format independent. Simply, macro refers to 1:1 or greater magnification (i.e. a 20mm wide object in reality would be 20mm or wider when projected on the sensor plane); whereas micro refers to magnification slightly less than this but more than would be encountered during normal photography – ‘close focus’ might perhaps be a more accurate term. Almost nobody seems to get this right online, even the manufacturers; ‘macro’ mode almost never yields 1:1 magnification, and there aren’t that many lenses that achieve this natively. (I suppose Carl Zeiss gets away with it by sounding German and putting a ‘k’ in Makro-Planar – these are 1:2 lenses.)

_3100_DSC0450bw copy
Water on slate

The 60/2.8 G replaces its predecessor, the 60/2.8 D, both of which are 1:1 lenses; unlike its predecessor, it reaches 1:1 through internal focusing alone, and the lens doesn’t extend – the front element on the G is a lot closer to the front of the barrel, and as a result, offers greater working distance at a given magnification than the D (which has a very heavily recessed front element). The lens has been completely redesigned with a new optical formula; it’s a 12/9 design with aspherical and ED elements, as well as Nikon’s Nano Crystal Coating. It also has a silent wave motor, but no focus distance limiter (oddly, the older version did have this). Focusing is fast and silent, but occasionally the lens does get ‘lost’ – if you’re say at the near focus limit and point it a subject at infinity, then sometimes it can hunt and fail to find focus. A quick tweak of the focusing ring solves this. One thing I have noticed with all of the Nikon SWM macro lenses is that they appear to be very ‘nervous’ when focusing at close distances; they’ll chatter and hunt and rack back and forth slightly. This could be because I’ve got the camera in AF-C most of the time, but it doesn’t really make sense given that everything is static – camera on tripod, inanimate subject. Still, I haven’t noticed any focusing errors, even on the D800E; in fact, this lens is the only one I’ve got that doesn’t require AF fine tune correction on any of my cameras.

_7050126 copy
Cigar

I also owned the previous version of this lens, and the difference mechanically is night and day; optically, somewhat less so, but the newer version is clearly better. (I suspect part of the reason why the G appears sharper is simply because it can focus more accurately without any of the backlash inherent to screwdriver-focusing lenses.) The biggest difference in optics between the two version are seen in off-center performance – specifically to do with CA – and bokeh. The new lens has very little lateral chromatic aberration; you have to be shooting something very, very contrasty and bright to excite it. For most subjects and shooting conditions, you probably won’t see any lateral CA at all. Longitudinal CA is a different matter – whilst again better than the old lens (and much better than the 105/2.8 VR), longitudinal chromatic aberration is still visible, as are traces of spherochromatism. It’s not a disaster, but it does mean that some work has to be done in postprocessing to remove traces of this – especially on say, white metal watches. On the bokeh front, the new lens has a 9-bladed, perfectly round aperture diaphragm that makes for very smooth out of focus areas; amongst the best I’ve seen, actually – though at normal distances, a 60/2.8 will not yield a huge amount of separation.

_7047913 copy
Alphabet pasta

It’s worth noting that the lens’ maximum effective aperture at 1:1 is about f4.8; this isn’t because it’s a variable-aperture lens, but rather because additional magnification always results in some light loss. The Nikon lenses and bodies are the only combination that reports this correctly – not that it matters, because the meter takes care of any necessary exposure adjustments anyway. I suppose it might be important if you were to calculate flash exposure with guide numbers, but I can’t think of anybody who still does that.

On the subject of flash, shooting into the light yields no problems at all; the Nano-coated element is clearly doing its job when it comes to suppressing flare. (I use partial backlight quite often to clean out backgrounds or help define the texture in watch dials.) Macro-and micro-contrast are both very good, improving slightly on stopping down. I feel this lens has a bit more microcontrast ‘bite’ than overall global macro-contrast; this isn’t a bad thing at all as it helps to extend dynamic range somewhat.

_7057468 copy
Breguet La Tradition

I actually don’t have much to say about resolution and optics: what do you expect? It’s a macro lens. There’s almost zero distortion or field curvature, and nothing funny going on with the focal plane. Sharpness is already excellent at f2.8, though with the D800E you’ll probably have to go to f4 or f5.6 to hit peak resolving power across the frame. Note that diffraction softening will set in by around f13 or so with the D800E; I try not to go past f16 unless I absolutely have no choice. That said, you can get away with f22 on the 12MP FX cameras if you need to.

Something I’ve been asked in the past is why I don’t use the 105/2.8 VR instead for greater working distance; the answer is that for the kind of work I do, the 60 actually holds several advantages. Firstly, I don’t need as many extension tubes to achieve higher magnifications*; secondly, the lens itself has much lower chromatic aberration than the 105 – lateral is fairly well controlled on both, but longitudinal is ugly on the 105 – and requires a lot of work to fix afterwards. Finally, there’s the issue of depth of field: for any given aperture, you’ll get more with the shorter focal length**. And given that you’re already challenged to find enough as it is, I’ll take any advantage I can get.

_7060545 copy
Who could resist a steak like that?

*The more mounts you put between your optics and your camera, the higher the chance of something going out of plane.

**A longer focal length does not mean that you can stop down more before diffraction sets in; that’s a property of the sensor’s pixel pitch, not the lens.

Of course, for those situations when I really need to manipulate depth of field, there’s the 85/2.8 PCE Micro – note it’s a Micro lens, because it only reaches 1:2 – and its full array of movements. That – and an accompanying piece on the Scheimpflug effect and how to properly use a tilt-shift lens – will be the subject of another article.

_7046476 copy
Girard-Perregaux F1-047

For the work I typically do with macro lenses – watches and food – the pairing of 60/2.8 G and 85/2.8 PCE is usually more than sufficient to deal with any possible scenario. If you shoot bugs, or want the lens to do double-duty for portraits, the 105 is probably a better choice; that’s not to say that the 60 can’t do the job; it just won’t give you the working distance or depth of field control you’d like to have. (The optics remain similarly excellent at longer distances – you could quite happily use this as a long normal lens if you didn’t mind the slowish f2.8 aperture; it out resolves all of the ‘regular’ 50 1.4s and 1.8s I’ve used, especially in the corners.) Perhaps the most telling fact I can leave you with is that of all of the lenses I own, it’s the one that’s been with me the longest. MT

The Nikon AFS 60/2.8 G Micro is available here from B&H and Amazon.

____________

Visit our Teaching Store to up your photographic game – including Photoshop Workflow DVDs and customized Email School of Photography; or go mobile with the Photography Compendium for iPad. You can also get your gear from B&H and Amazon. Prices are the same as normal, however a small portion of your purchase value is referred back to me. Thanks!

Don’t forget to like us on Facebook and join the reader Flickr group!

appstorebadge

Images and content copyright Ming Thein | mingthein.com 2012 onwards. All rights reserved


Filed under: Gearhead: Reviews

Quick review: CarrySpeed DS-2 sling strap

$
0
0

_5016081 copy

Full disclosure upfront: I was recently sent a couple of interesting camera straps by the folks at CarrySpeed/ Kroxmedia – the DS-2 is of the sling variety and has a fixed portion that goes diagonally around your shoulders as shown in the image above, and a sliding loop that holds your camera and allows it to rest around waist level, or be easily brought up to shooting position. There are quite a lot of similar products, which I’ve not really been too enamoured with for a couple of reasons: firstly, the camera connection point doesn’t have a quick release, which means that if you need to take it off or stow it, it’s not easy to do so; secondly, the hardware just doesn’t inspire confidence.

The DS-2 doesn’t have the second problem. It’s a very well made strap; perhaps over engineered in some ways – I feel there are just too many plastic loops and buckles through the webbing portion – but the thick neoprene padding with non-slip backing is certainly appreciated and spreads out the load nicely. There’s also a quick release buckle to allow you to detach the strap completely, which has a safety interlock to prevent accidental release and expensive crunching noises.

_5016086 copy

The first problem is partially solved on all models through the use of a ball and locking threaded socket connector; the former screws into the tripod socket of your camera, and the latter is fixed to the strap with a metal loop. It’s easy to attach and detach when needed, but not easy to accidentally detach – and the locking screw has to be fully undone before the ball releases, which is a good half a dozen turns. If you’re a tripod user, there’s an optional Arca-compatible quick release plate whose ball swings out of the way when mounting; unfortunately, no joy to those of us who are stuck with the enormous 410PL plates Manfrotto uses on its geared heads.

Try as I might, I couldn’t find a way to get comfortable with this strap on my (mostly) tripod-based Nikons; it simply isn’t designed for that. However, I did find that it seemed to work best used on the Hasselblad 501C – where it now lives – because most of the time I shoot this handheld, and it simply isn’t comfortable around the neck or easy to swing into position when worn over one shoulder. The heavier weight of the camera helps to anchor it in place and stop it from moving around too much, too. I admit I was a bit nervous putting this much weight on the connection at first, and held a hand under the camera to cradle it in case it fell; I’ve since become much more comfortable and it now pretty much swings around freely. There’s one other little bonus I’ve discovered: the plain little knob-shaped quick release is useful for two things: firstly, on the Hasselblad, it helps me stabilize the camera because I’ve got somewhere to hook a finger around; secondly, it’s useful as a mini-monopod cum-ballhead when resting the camera on a table – just take it off the strap and use a hand to support it.

There are some cameras I probably wouldn’t use it on though – the smaller mirrorless cameras might swing around a bit because they’re not big enough or have lenses long enough to stay in place against your body; and be a bit careful with the digital Leica Ms, because their baseplates are not known to be the strongest – especially the small metal lip that hooks over the opposite end to the locking nut…

In short: if you’re looking for a sling-type strap, the CarrySpeed DS-2 does the job nicely. It’s a good product for street photographers and people who want to have the option of using both hands but at the same time have a camera in a comfortable quick-draw position. MT

____________

Visit our Teaching Store to up your photographic game – including Photoshop Workflow DVDs and customized Email School of Photography; or go mobile with the Photography Compendium for iPad. You can also get your gear from Amazon.comhere. Prices are the same as normal, however a small portion of your purchase value is referred back to me. Thanks!

Don’t forget to like us on Facebook and join the reader Flickr group!

appstorebadge

Images and content copyright Ming Thein | mingthein.com 2012 onwards. All rights reserved


Filed under: Gearhead: Reviews

Review: The Contax T3

$
0
0

_8027251 copy

First, a starting note. Reviewing film cameras both takes a little longer and always somehow feels a little less complete than doing the same for digital; I suspect it’s because there really are quite a lot of unknowns in the equation which you can’t determine whether are due to the camera or some other portion of the process. Still, there are definitely characteristics that shine through regardless – part of this is perhaps down to the equality of media across all cameras – an F6 has the same sensor as a Mju II, which in turn has the same sensor as a 1930s Leica I. Differences are down to glass, assuming that processing is carried out consistently. When evaluating images in the analog domain, it’s already difficult enough to form an opinion based on a small websize jpeg; this is why it’s important to go along with the words of the reviewer as they’ve (hopefully) seen large, uncompressed files on a calibrated monitor – what you’re seeing is merely for illustration and perhaps to break up the enormous blocks of text. The same goes for film: a web scan isn’t going to have anywhere near the same amount of information as the original negative; even printing introduces an additional variable into the mix which might lead a review to conclude erroneously.

_8027013 copy
Lunchtime

With that out of the way, let’s talk about the camera up on the block today: the Contax T3. Contax is a Japanese brand, later bought over by Kyocera-Yashica, and now defunct (the owners of the brand no longer have any facility for the production of cameras). The T cameras (with the exception of the T4/T5) were a series of premium compacts featuring some manual controls, all-metal construction, and Carl Zeiss T* lenses (including the T4, and subsequent Yashica cameras). The T3 was the pinnacle of the range from a design standpoint; it was one of then smallest 35mm compacts at the time, bodied in smooth titanium – either natural finish or black – and featured a Zeiss 2.8/35 Sonnar. Just to prove they spared no expense, the shutter button and viewfinder/ AF windows on the front of the camera were all made from synthetic sapphire. This was definitely not a cheap camera when new (and still isn’t exactly cheap today, either).

_8027010 copy
Smoking

All the effort does come across the moment you pick it up, though – they got the tactility bit very, very right. Controls feel tight and positive, and even the mode buttons have a decent amount of travel to them and provide positive clicks. There really aren’t that many controls on this thing at all: the top has a small LCD for mode display and frame counter; there’s a flash mode and mode mode button, a tiny control dial, an AF-lock button, and the combined aperture/ power/ program mode wheel, which locks in the off and P positions by means of a central button. It’s a bit fiddly to power on with one hand, but at least it won’t accidentally extend the lens in your bag or pocket (Ricoh GR1V, I’m looking at you). Oh, and there’s the aforementioned sapphire shutter button, of course.

_8027073 copy
A lot of lawn to mow.

It is a boxy design, but fits in the hand reasonably well, and the titanium finish isn’t that slippery (though I’d recommend the use of a wrist lanyard to prevent expensive accidents). Like all cameras of this genre, it has a viewfinder. Whilst a lot better than the pathetic excuse for viewfinders tacked on as an afterthought (if at all) to some digital cameras these days, it’s still not going to measure up to a proper SLR or medium format camera. I’d say subjectively, it’s about the same size as an entry level APS-C finder, or similar to the Fuji X10. That said, the view is bright, clear and brilliantly contrasty, plus color neutral – much better than the finder of my GR1V, though the GR1V provides better eye relief and frame line visibility. For eyeglass wearers, there isn’t as much eye relief as I’d like, plus the frame lines can be difficult to see in bright light; they’re just not contrasty or bright enough. The GR1V wins in this regard.

_8027070 copy
Urban abstract

There’s information in the finder, too – it’s not just a dead tunnel. On the right side are indicative shutter speeds (if you get 500, then it’s 1/500s; if you get 500 and 125, then it’s 1/250s or something in that ballpark, etc.). There’s a focus distance readout on the top panel too, just to make sure you’ve focused on what you want – important seeing as there’s no way of confirming focus through the viewfinder seeing as it’s a non-TTL finder. Focusing is actually surprisingly fast considering the lens has to move through a decent distance (it is a real 35mm focal length that focuses down to 0.4m on real full frame, after all); the camera uses phase detection sensors. Subjectively – I’d say it’s probably on par with the faster modern compact digitals. You definitely don’t get the impression the camera is keeping you waiting, but you might land up working slower than normal because you’re not 100% sure if it nailed focus – and this matters if you’re shooting wide open, since depth of field won’t always cover errors especially at shorter subject distances. More importantly though, AF was accurate.

_8027021 copy
Chairs are like cows and might give you headaches

Using Ilford Delta 100 film (all of the images in this review were shot on that medium), the T3′s lens produced wonderfully sharp and contrasty images, with excellent performance even to the edges. Stopping down to about f5.6 or so is required to get perfect cross-frame sharpness, but the amount of detail the camera is capable of resolving is very, very impressive – right up there with the best DSLR and M lenses I’ve used on film, and coming up against the grain-imposed limits. Even on B&W film, the lens seems to have the trademark Zeiss microcontrast and ‘pop’; transmission is also high as the negatives produced were dense and rich*. Bokeh, when there was some – it is a 35/2.8 after all – was smooth and non-objectionable, with nicely rounded out of focus highlights and almost no bright fringes – I suspect this is probably a non-aspherical lens design.

*Density is affected by development time, but I’ve settled on a consistent time and temperature for the two or three films I regularly use, which gives me some basis for comparison.

_8027065 copy
Envy

The camera also has a number of other handy features, some of which are quirky, some of which aren’t useful, and some of which are downright annoying. Let’s start with the latter: it doesn’t seem remember any of your settings when you cycle the power, defaulting to AF and flash off. It does remember exposure compensation, however. Using various combinations of the mode button and command dial, you can set manual focus by distance, long shutter speeds, and exposure compensation. It’s a bit fiddly, to be honest; the good news is that the camera never seems to rarely require exposure compensation in the first place – the meter is pretty good, and the large latitude of black and white negative film pretty much takes care of the rest. It’s worth nothing that as with all of these compact film cameras, there’s no continuous AF or drive modes (Sony RX100 with subject tracking and 10fps, anybody?). In any case, you probably wouldn’t want them; this isn’t really the kind of camera you’d shoot action with.

_8026992bw copy
Nadiah and the latte

There were two cameras I had in mind when shooting the T3; firstly, the Ricoh GR1V, which I had in my pocket (and will be the subject of a future review) and the Sony RX1. The former, because back in the day the T3s, CMs, GR1Vs, 35Tis etc competed for the premium camera pocket slot; the latter, because it too has a 35mm Carl Zeiss lens, and is the only (somewhat) ‘compact’ full frame camera on the market today. Even if you paid top dollar for a T3, you’d still be enjoying a 60-70% discount on the price of an RX1; that’s enough for a LOT of film, perhaps 250-300 rolls including processing. It’s doubtful that most RX1 owners will shoot that much, and certainly won’t give as much care to each individual image. (Try as I might to carry over my film-shooting mentality to my digital work, I simply can’t; the moment I pick up anything with a screen, I’m trigger happy.)

_8027044 copy
Repurposed

The question I have is twofold: firstly, which will you enjoy using more, and secondly, does it matter? I have no doubt that the RX1 will win hands down on flexibility, image quality and consistency; anything with film in it is basically uncertain until you’ve developed it and scanned it, and even then there are so many things that could go wrong in the process. This frustration and element of randomness might be a good thing or a bad thing; I suppose it depends on whether the shot matters to you or not. Me, I’ll pick up something digital for any application that’s critical, and I’ll probably not use a compact on assignment unless there’s a very good reason to (though I have in the past, and might well do again in future).

_8027024 copy
Backyard

The only conclusion I can come to is that for casual photography, these premium point and shoots are worth a look: not only do you get the optical (depth of field, etc) properties of full frame, but the entry cost is significantly lower; moreover, there’s almost zero depreciation. And – personally – best of all is the distillation of photographic control: you don’t have to worry about custom functions etc; it’s just aperture priority, exposure compensation, and a viewfinder. You focus on making the image, rather than having some of your attention diverted towards operating the camera. Interestingly, despite my intense personal dislike of the 35mm field of view, and the nearly-invisible frame lines that made it somewhat difficult to compose (or perhaps because of) I didn’t really notice it at all during the test period – perhaps this has something to do with it. Transparency is an interesting concept, but I don’t think this camera manages it – or any of the premium film compacts, for that matter. Still, I have to say that I very much enjoyed shooting with the T3 – now to sit and wait until some manufacturer realizes that they’d probably sell a boatload of digital versions at the right price, with the minimum of features…MT

A big thank you to Bellamy Hunt at Japan Camera Hunter for the loan of this camera for the review; this actual unit is available for sale – get in touch with him for details.

____________

Visit our Teaching Store to up your photographic game – including Photoshop Workflow DVDs and customized Email School of Photography; or go mobile with the Photography Compendium for iPad. You can also get your gear from B&H and Amazon. Prices are the same as normal, however a small portion of your purchase value is referred back to me. Thanks!

Don’t forget to like us on Facebook and join the reader Flickr group!

appstorebadge

Images and content copyright Ming Thein | mingthein.com 2012 onwards. All rights reserved

_8027077 copy
Hydrant and bicycle

_8027048 copy
Mind the gap

_8027033 copy
Camouflaged construction – in the full size scan, the individual leaves on trees are very visible and distinct.

_8027022 copy
Reflections

_8027015 copy
Hiding Rudolph after Christmas

_8027003 copy
Impractical fashion


Filed under: Film Diaries, Gearhead: Reviews

Review: The Ricoh GR1v

$
0
0

_8027094 copy

Earlier at the start of this year, I was lucky enough to have not one, but two of the cameras I lusted earlier in my photographic career show up – the Contax T3, reviewed here, and the Ricoh GR1V, which is the subject of this article. My first encounter with the GR1 was in 2001, when I was a student and there was still an independent pro camera store on Oxford’s High street. I was looking for a compact point and shoot and played with just about everything they had to offer, but landed up being seduced by something small and horrible (an APS Fuji Tiara 1010i, of all things). The GR1 (or perhaps it was a GR1v) was the only one that left much of an impression due to the way it felt, and the rather stiff price tag. Later, I recall a time in late 2005 or early 2006 when I visited a local camera store – at that point I was very much in the acquisition phase (not that it ever really stopped) on the hunt for exotic old lenses; the faster the better because I was still dealing with the limitations of the D2H. They had the Ricoh GR-Digital in stock, and the GR1V too – I landed up handling both, once again very much liking the feel of the GR1V, but walking out with the GR-Digital.

_8027221 copy

I’ve had a love-hate relationship with the GR Digital series – I never felt that comfortable with the 28mm lens on the I, and the image quality wasn’t really that good given the price of the camera, compounded by a virtually unusable RAW mode; however, I did love the ergonomics and build quality. Plus it had the best control system of any compact up to that point. I had a GR-Digital II on long term loan whilst I was editor of CLICK!; this was a fun camera, probably because it now shot buffered RAW, had a better sensor, and I’d learned how to properly use a wide angle. GR-Digital III served as my carry-everywhere camera for two years until the E-PM1 showed up, since replaced by the RX100. I digress: as excellent as the later generation GR-Digital series is, I’ve always felt the one that got away was the GR1v – and in some ways, a solid representation of the ultimate pocket camera: small, fast, light, controllable, packing a useable viewfinder, and excellent controls. Oh, and a large sensor.

_8027209 copy

The GR series actually comes in a few flavors: the original GR1, GR10, GR1s, GR1v and GR1v date, and finally, a GR21; all are available in black or natural magnesium finishes; all have 28/2.8 lenses except the GR21, which has a 21/3.5 that doesn’t fully collapse back into the body. The GR1s and GR1v have improved optical coatings for better flare resistance, and the GR1v adds multiple SNAP distances and manual ISO selection. All cameras are magnesium alloy, feature bodies that aren’t much thicker than a 35mm film canister (and in some places, thinner) phase detection AF, viewfinders with fairly comprehensive information displays, and a backlit top panel LCD for mode setting and frame count. They also have two knobs on top: the left is for exposure compensation, and the right moves between program and aperture selection, with manual ISO override being the last setting, and everything moving in 1/2 stop increments. There’s a flash mode switch on the back, a power button, a couple of indicator lights, and that’s about it. Date imprint – on the version that has it – is controlled by a clock which is visible and set via buttons and a tiny LCD on the side of the handgrip. The front portion of the retracting lens has a negative bayonet to mount the tiny supplied hood.

_8027231 copy

I opted for a black GR1v non-date, sourced by Bellamy Hunt at Japan Camera Hunter. Unlike the Contax T3, this one is mine – bought and paid for to keep. I had high expectations of this camera – born of both popular photographic lore and my experience with the digital series. Would it live up to expectations?

So far, the answer is yes and no. There are things which I like a lot in operation, things that I don’t, and things that I’m ambivalent about. Let’s start with the bad. Firstly, the viewfinder is nowhere near as clear or contrasty as the Contax T3′s; I suspect it’s because the outer protective panel that covers the internal optics and PDAF windows are made of plastic, not sapphire. It could also be because of the LCD overlay, which carries the frame and parallax correction lines, shutter speed and focus information. It also flares a bit, which can result in odd haloes – don’t worry, these won’t be present on your images. Unlike the T3, the framelines are very visible under all light conditions, and there’s enough eye relief for spectacle wearers. There are a couple of lines that activate for near-distance parallax correction, too. Under low light, there’s an LED illuminator for the viewfinder information. As mentioned, you also get some basic information in the finder about shutter speed on the left edge (to the nearest stop or thereabouts), focused distance (via a series of symbols – flower, one person, two people, mountain) and the AF box used. All in all – not the most comprehensive system I’ve seen, but I’m amazed it’s taken until the recently-announced Fuji X10s for a digital compact to carry anywhere near the same information in anywhere near the same size viewfinder – the GR1v’s finder isn’t massive and doesn’t provide the same view as an M Leica, but it’s certainly no worse than what passes as a viewfinder in today’s entry-level DSLRs.

_8027239 copy

On the subject of autofocus: I can’t think of any other film compact that allows you a choice of not only manual preset distances (1m, 2m, 3m, 5m and infinity), single or multi-point AF modes, and an infinity lock. The GR1v has three fairly tightly clustered points around the center of the frame, which are determined using a phase-detection array; it’s both active and passive, which means that it’s very fast under just about all light conditions – comparable to the current GR-Digital IV, which is fast – but also that it has a non-cancellable AF assist lamp. Fortunately, it’s dark red because the PDAF system appears to use infrared. Once focus has locked, the finder shows both which point was used (left, right or center assuming you didn’t select single point mode, MF or infinity) and the chosen distance. Interestingly, Ricohs have always offered one other unique mode – SNAP – which defaults the lens to a preset distance (I think around 2-3m, or perhaps it’s hyperfocal). On the GR1v, it’s fixed; on the digitals, you can use SNAP in conjunction with AF – if you jab the shutter and the camera can’t find focus in time, then it just goes to the SNAP distance; if it can, then normal AF is in play.

_8027219 copy

In use, the whole setup is pretty intuitive – the camera’s thin body hides nicely inside any pocket (it’s thinner than the RX100; I measure it at just 23mm at the thinnest point and 30mm at the thickest – the grip portion which also accommodates the film cannister) and the ergonomics and feel are superb. It’s light due to the magnesium body, but it’s solid and tightly put together. Perhaps the only fiddly bit is setting a manual distance, which requires you to have a long press of the MODE button on the selection before SNAP, so that when you enter SNAP, you can then use short presses to select your desired distance, or another long press to exit. Practically though – the ability to switch between aperture and program modes very quickly is great if you’re going indoors-outdoors a lot, especially in the tropics; indoors, flip it to 2.8; one detent turn to the right gives you program for when you exit the building. Important, especially you can’t alter sensitivity for each frame (film, duh) and the maximum speed of the GR1v’s leaf shutter is just 1/500s. It’s equally handy to be able to check your settings beforehand, too – selected aperture and exposure compensation are visible straight away. It’s also worth noting that as with all compacts, the GR1v uses a leaf shutter – which is both quiet and low vibration. Sadly, the operating noises – focusing, winding etc – are much louder than the shutter click.

_8027216 copy

Speaking of winding, you’re not going to load film in this one in a hurry: it prewinds the film out of the cassette, which takes about 30 seconds or so. This means that a) if the camera gets opened by clumsy fingers or overzealous security personnel, the images you’ve already shot are safely back inside the canister, b) it knows exactly how many images are left, and c) you can rewind a roll halfway through, press the rewind button a second time while it’s winding to leave the leader out, then shoot the same roll in another camera (NOT a GR1v, obviously) up to the remaining frame. Or you can just press the rewind button once it starts auto-winding on the last frame to leave the leader out to make loading your developing spools easier.

One fairly common known problem with the GR1 series is the top LCD has a habit of fading out and failing to display anything at all; not critical but it does make figuring out how many shots you have left or what AF mode you’re in quite tricky. The rest of the camera still works fine, though. Ricoh in Japan are still accepting repairs (to the best of my knowledge) and apparently they also offer a service to adjust the tension of your shutter button – I’m quite happy with mine as stock, thank you.

_8027123 copy

It’s time to talk about image quality. Wide open, the lens gives the impression of a more classical-rendering optic: slightly lower contrast, a little haze, but still resolving fine details well; it doesn’t have the same snappy micro- and macro-contrast that the Zeiss optic in the Contax T3 has; the negatives produced simply aren’t quite as punchy. Stop it down a bit though, and the punch and detail comes back; it’s hard to test conclusively, but I suspect the sweet spot is from f5.6 onwards. Presumably, flare might have been an issue at some point – hence the little bayonet hood – but I haven’t seen it in any of my images. Still, the lens most certainly produces pleasing tones, and I’d consider moderate contrast to be an asset especially in the tropics, where direct sun can be incredibly bright and your dynamic range enormous.

_8027194 copy

Overall, I’m satisfied and reasonably happy with my negatives, but not overjoyed and surprised – admittedly this could be down to my processing or film choice as much as anything else. The level of detail resolved certainly appeared to be as good as what I achieved with other 35mm cameras and the same film, though it didn’t leave me with the same ‘wow’ factor as the Contax T3. It seems that the ideal compact film camera would be a merger of the two – the lens of the T3 inside the body of the GR1v – sadly, I don’t think we’re going to see any more new 35mm film designs apart from toy cameras, let alone a serious ‘professional’ grade one. Still, don’t let this stop you from picking one up to try: as with all things film, prices are holding fairly steady, which means you can always turn it over again at little to no net cost should you not like it. We buy these things without the same expectations as digital; think of it as a way to get the same ‘look’ – by which I mean depth of field and angle of view properties – as a full frame camera in a much, much smaller package. Sure, resolution and technical image quality probably lacks behind the current bunch of high end compacts (including the GR-Digital IV) – but that’s not why we shoot film, is it? MT

_8027178 copy

Coda: I wrote this review before shooting with the camera in Yangon; I’ve also significantly improved my processing and scanning technique (not so apparent at web size, but very, very obvious when viewing at higher resolutions). The three rolls of Delta 100 that came back, frankly blew me away. I’m definitely getting that silly grin now: the camera produced results far above my expectations, and on par with anything as good as I’ve seen on 35mm film. There were two images that stuck in my mind for detail, microcontrast and tonality; both are direct scans and have had nothing done to them other than my usual automated action for converting and re-inverting negatives. Read: no local corrections. The first is my attempt at a hommage to Sebastiao Salgado’s legendary Workers series; the second, merely a teabreak. Regardless, the resolving power and characteristics of this lens are most impressive indeed – it also makes me wonder how we ever managed conclusive tests before digital repeatability…MT

_8028057 copy

_8027885 copy

____________

Visit our Teaching Store to up your photographic game – including Photoshop Workflow DVDs and customized Email School of Photography; or go mobile with the Photography Compendium for iPad. You can also get your gear from B&H and Amazon. Prices are the same as normal, however a small portion of your purchase value is referred back to me. Thanks!

Don’t forget to like us on Facebook and join the reader Flickr group!

appstorebadge

Images and content copyright Ming Thein | mingthein.com 2012 onwards. All rights reserved

_8027170 copy

_8027126 copy

_8027155 copy

_8027153 copy


Filed under: Film Diaries, Gearhead: Reviews

The 2013 Leica M Typ 240

$
0
0

_8027510 copy

Previously in October 2012, I had a chance to handle the M Typ 240 (I’m going to call it the M 240 from hereon in) back at the Kuala Lumpur launch event, and produce a quick preview (that can be found here). At that point, the camera was a very early functioning prototype – yet the improvement over the M9 was clear. There was of course no way to get images onto a PC for review; the SD card was glued in and the grip had no USB ports. Frustratingly, things appeared pretty good on the new (and larger) rear LCD. But we all know that such small and limited-gamut monitors are not a good way to determine image quality at all; I was thus itching to get my hands on a camera, or at very least, some good files to play around with. I’m not really a fan of long waits to availability – whilst it’s nice to know what’s in the works, I’d rather not have to wait six or more months before I can actually buy one. By then, the world might just have moved on.

_8027479 copy

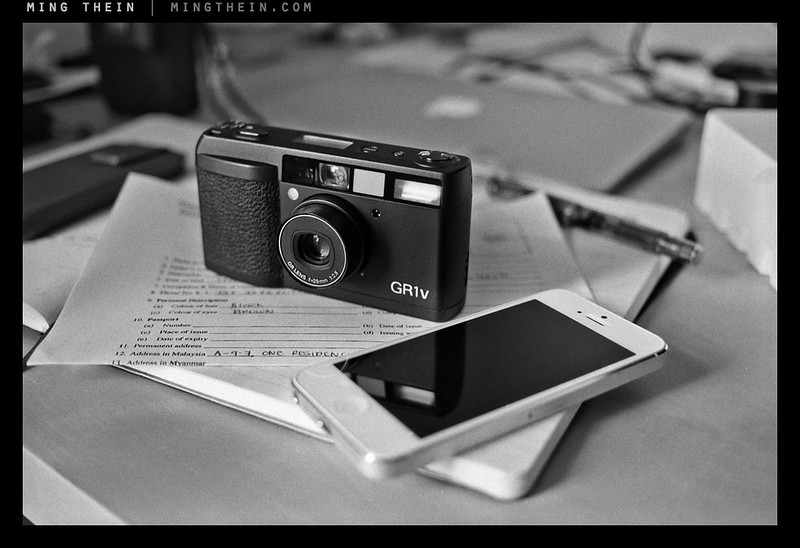
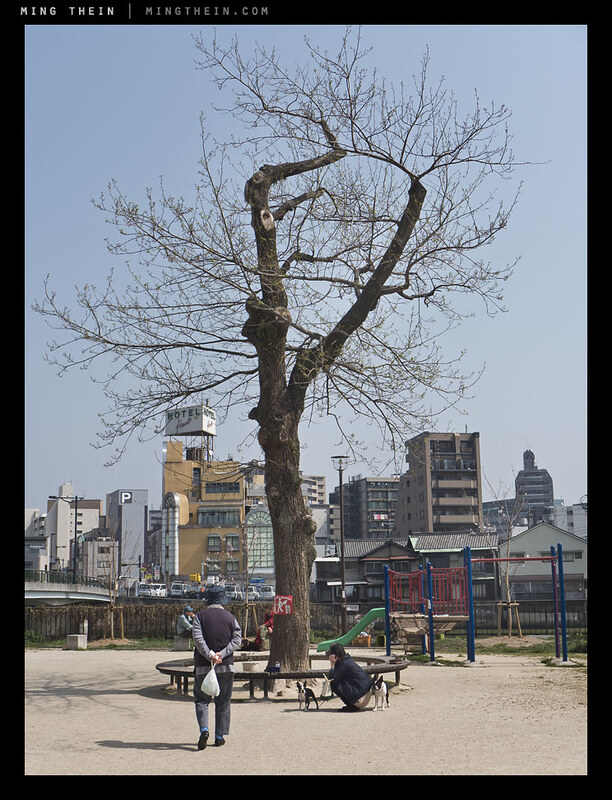
In the meantime, we were given a bunch of rather ho-hum samples to which the internet community at large has been at best ambivalent, at worst, downright unimpressed by – I’ve even had multiple emails asking me if I thought it was a hoax, and expressing outrage – not that I have any influence over the camera makers. The bottom line is that the photographers weren’t amateurs, and thus the fault could be either of two things: the camera, or lack of familiarity with it. I’m not going to blame or defend either man or equipment, but I’ll say one thing: it would only be fair to use it myself before drawing any conclusions. I’m quite pleased with the output achieved here, even if there was some fiddling required in the process (more on that later). This was the mystery ‘extra camera’ I carried on my last trip to Yangon, in addition to the Ricoh GR1v and Sony RX100 (which wasn’t used at all, actually).

_8027486 copy

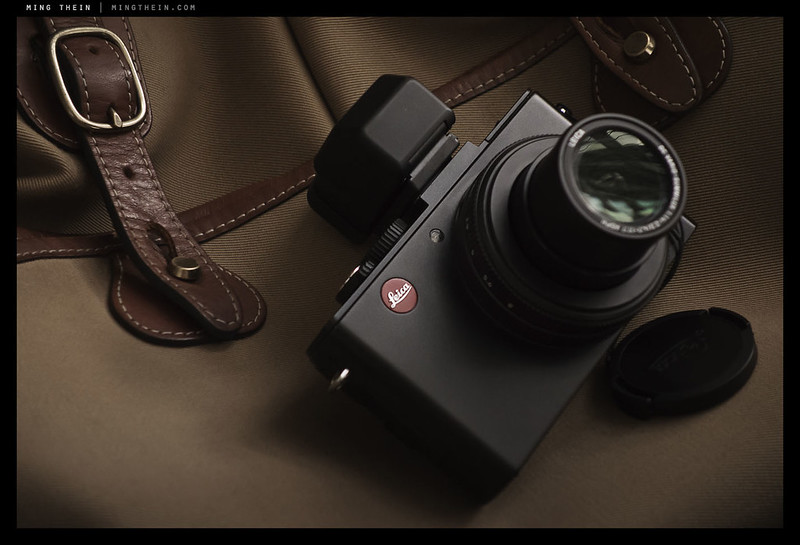
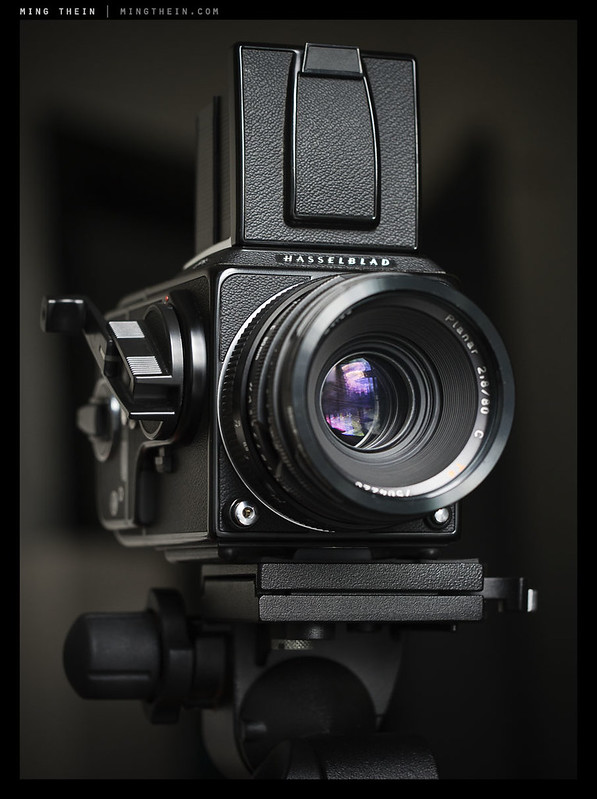
Yes, I do my own product shots. No, you can’t use them for free for your site. I’ve had enough people ripping me off that I’m spending a lot of money on cease-and-desist letters.

_8027538 copy

_8027493 copy

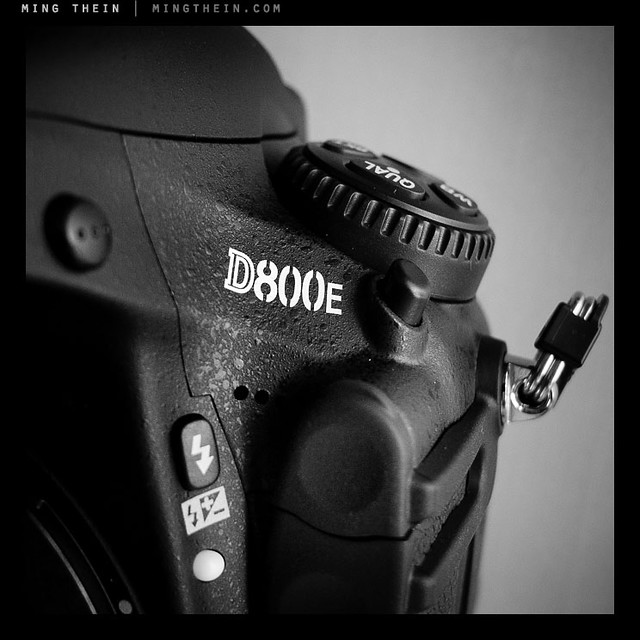
Disclaimer/ objectivity: I was involved in the testing process for the camera – thank you to Jesko Oeynhausen, Sunil Kaul, Mathieu Musnier and George Wong at Leica for the invitation. What follows are my detailed observations and thoughts from my period spent testing a near-final prototype. Whether any of my dozens of observations and suggestions were incorporated or not, I can’t say until the final firmware is out, but I do know that plenty of attention was given. Sample images in this review were shot with the Leica 50/2 APO-Summicron-M ASPH, Leica 28/2 Summicron-M ASPH, Zeiss ZM 2.8/28 Biogon T* and processed via ACR (no profile) in CS5.5. I won’t be posting full size images as is my standard policy; there is just too little respect for intellectual property online and poor images are rather meaningless. Product images were shot with a D800E and various macro lenses. Note: please look at the original size images on Flickr (clicking through the images will get you there) – their resizing algorithm seems to introduce some haloes at smaller sizes. Original doesn’t show these.

_M240_L1000287bw copy

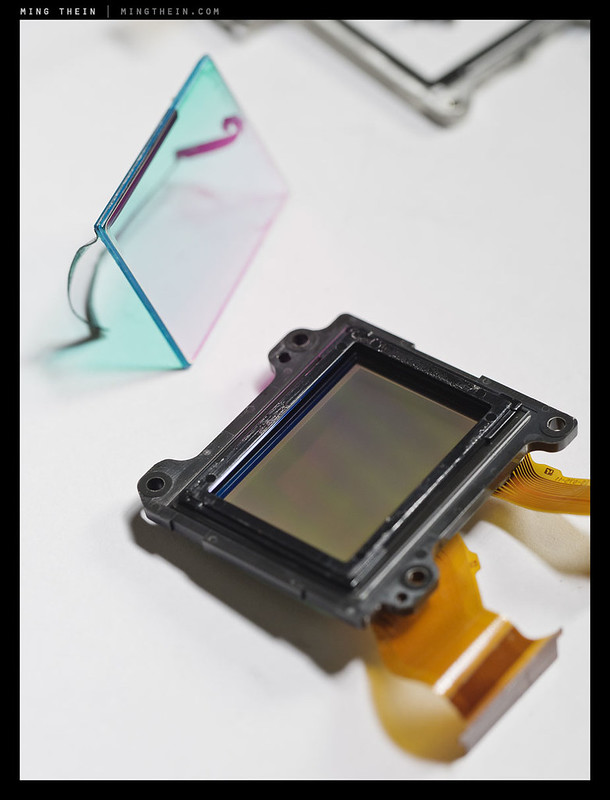
First off: the M 240 is an enormous leap forward ahead of the M9 in every area; in fact, it feels like several generations have been skipped. The shooting and usability envelope has been hugely expanded, and that doesn’t include the myriad improvements that have taken place everywhere else, too. We all know the core specifications – 24 megapixels, custom CMOS sensor collaboratively designed by both Leica and CMOSIS which is now capable of around 4fps, live view and 1080p25 video. The sensor also has an improved, flatter microlens array for both higher light collection and better cooperation with legacy lenses, especially wideangles. This becomes increasingly important at the edges as the sensor’s resolution increases.

_M240_L1003372 copy

Aside from that, major changes – hardware/ ergonomic and firmware/ operational – include:

  • The LCD is now 3″, and has VGA resolution – color, detail and brightness are pretty much close to the OM-D and D800E, though not quite as good as the 1.2MP unit on my RX100. I’d say catchup with the competition rather than a huge improvement in this area.
  • The camera can now take an EVF via an accessory port under the hotshoe; it shares EVF units with the X2 (and some Olympus cameras, it seems). There are also other accessories that can use this port – notably an external microphone.
  • There are some extra buttons: LV to toggle Live View on the row under the viewfinder; ‘M’ to start video recording next to the shutter, and the focus assist button where the rewind interlock toggle was traditionally located on film Ms, under the shutter button on the front panel. Here, it activates peaking and magnification (adjustable using the rear dial); if held down while turning the rear dial, then it adjusts exposure compensation – which is also visible in the viewfinder information display.
  • The dial surrounding the D-pad has now moved to the back of the top panel, integrated with the new thumb grip.
  • The frame line illuminator window is gone, replaced by LED frame lines in either red or white (personally, I prefer white)

_M240_L1004083 copy

  • The entire base area has been redesigned; the baseplate now attaches via a larger, more secure stud on one end, and the tripod mount is integral with the camera body instead of the baseplate. When mounted, the baseplate is thus sandwiched between the camera and tripod head, and is much, much more secure than the old solution (too many stories of the small metal flange breaking off). The baseplate covers battery compartment, SD card, and now also an I/O port that interfaces with the optional Multifunctional Handgrip M, which adds a GPS module for geotagging, AC adaptor socket, SCA hotshoe communicator, PC-sync socket and USB port. There’s also a dumb-handgrip which is purely ergonomic. Both handgrips have sockets to accept a similar finger grip system as was used on the M9 Titanium.
  • The M 240 uses a new, larger battery – it has double the capacity of the old one, charges much faster (new charger, of course) with a rapid charge function to about 80%; battery life is around 600 shots or so with the EVF or live view, and I was averaging close to 2,000 with moderate LCD reviewing and normal viewfinder use.
  • The shutter is massively improved: it’s crisper, quieter, better damped/ lower vibration and no longer has the buzzing rewind sound of the M8/M9. To match, the feel of the shutter button has now been similarly improved; it’s no longer notchy and ‘tight’. Instead, a half press activates/ locks the meter, and there’s a short but distinct break to a full press. The ‘discrete’ and ‘soft’ modes of the M9 are no longer available, nor are they required. This may not seem to be much of a big deal, but shutter feel matters: both to the photographer’s ability to handhold the camera at low speeds, as well as the enjoyment of using the camera.
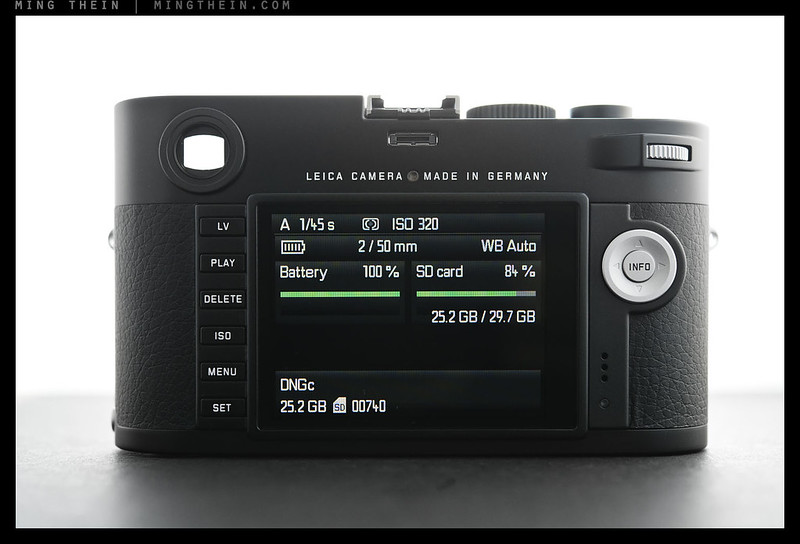
  • The entire menu and firmware have been completely revamped; there are a lot more options, and as a result more closely resembles the X2 and S menus. You can still save profiles, have quick access to important settings via the SET button and a black screen, and check camera status with INFO.

_M240_L1004536bw copy

  • Oh yes, the D-pad now has a center button – it brings up camera status when pressed from a black screen, or serves as SET/ enter/ OK in every other situation except delete.
  • We’re no longer restricted to centerweighted metering: the M 240 has an ‘advanced’ mode that offers matrix and spot metering too. It uses the sensor to meter, which means both more precise metering, but lower battery life since the shutter is open and the sensor powered up and slight lag because it has to cycle the shutter – there’s no electronic first curtain. The matrix mode is excellent, but I found the spot mode a bit hit and miss – there’s no way to accurately determine the spot area in the optical finder. Works great with live view and EVF, though. The main centerweighted meter (that uses reflected light off the shutter curtain) still gets fooled somewhat by point light sources – though it’s nowhere near as bad as the M9 was. We’re talking 1-2 stops instead of 4-

_M240_L1003140 copy

  • The frameline preview lever is gone – I must be one of the few people who actually used and now misses it.
  • There’s now a virtual horizon function
  • You can rename the filename prefix – very useful if you’ve got many files all titled with L-something from different cameras…
  • The M9′s left-side notch is gone; it’s now been filled in (presumably) by the microphone. Unfortunately, the placement of the microphone means that when you’re shooting with EVF and your right eye, the microphone picks up the sounds of your breath…shoot with the rear LCD or the EVF in the waist level/ 90deg position instead.
  • The camera is slightly thicker and heavier than the M9; presumably this has something to do with the new rear LCD or the thumb hook. You do feel it in the hand; it’s not quite as svelte as the film Ms (and probably can never be, given the sensor, board and LCD have to fit in the depth of the film, pressure plate and back.
  • For the DIY types, the vertical rangefinder adjustment now uses the same 2mm hex screw as the rangefinder infinity position (instead of the previous custom tool). People tell me I’m making far too big a deal of this.

_M240_L1004639 copy

I think it’s safe to say that when you have to put in several images to visually break up the huge column of text, this is not a trivial number of changes. The overall feeling is not so much evolution as a completely new camera. Sure, the controls are mostly in the same place, it looks and feels the same in the hand, you use the viewfinder and rangefinder to frame and focus, but oh boy – the impression given in use is completely different. The M9 felt like a film camera that was missing a wind lever, but instead made a buzzing sound and produced an image on the back; it also wasn’t the most reliable of cameras (the well-known SD card issues, for instance). I suppose defenders will claim that’s a bit like the unpredictability of film, too – it’s not, film never cost me a large job. In contrast, the M 240 feels like a mature, complete, competent camera that can both be operated like the M9 – set everything once and just focus on the main controls, ignore the LCD if you desire – and feels like it integrates well with the rest of your camera systems. The good news is that it no longer eats cards; the bad news it does have an odd startup lag – up to several seconds – that seems related to capacity, speed and how full your card is – small, fast cards are best to keep this to an absolute minimum. You can of course turn standby off and leave the camera on, which speeds things up at the expense of battery life.

_M240_L1002838 copy

At present, the M 240 is the only full frame mirrorless camera available; its short back-flange distance (the M mount is about 28mm, compared to 45mm+ for most SLRs) means that it’s compatible with just about every other lens out there via an adaptor. Of course, the M 240 with EVF and suitable adaptor is also Leica’s solution for legacy R-system users; not having any investment or experience in the R system, I was far more interested in how the camera would do with my Nikon F mount glass. The way I use my Nikon system now tends to be mostly tripod based with live view for critical focus; sometimes I shoot reportage with a lower resolution body/ body pair and/or an OM-D for more reach. You can see where this is going: it would be nice if I could condense my multiple systems and backup bodies down to just one or two.

I suspect that if the pricing is right, there will be a lot of pros taking a long, hard look at the Canikon flagships and wondering if this might make an interesting alternative: with the D4 and 1Dx being within 10-20% of the price of the M 240 – at least in Malaysia – it becomes a viable option. I know it’s something I’m considering. Lens cost may skew the equation somewhat, but then again perhaps not – you can use your legacy lenses via adaptors, and just get native M-mount glass (Leica, Zeiss, Voigtlander) for the one or two critical focal lengths. Unfortunately, due to lack of time, location work, limited subject material, assignment schedules etc. – the one thing I didn’t get to test was the way the camera worked as a studio camera – and specifically, how it would fare for horological work with my Nikon flashes slaved in SU4 mode – can’t think why it wouldn’t work, though. I suppose that will have to wait for next time.

_M240_L1002775 copy

The M system now has the advantage of being able to serve as both a backup location or studio camera, as well as an excellent travel setup. For precise framing and focusing with longer lenses, there’s now the EVF and live view – there is no longer any need for a visoflex or second system body. I plan to streamline my systems – or at very least the backup bodies – down to just one M now that it’s a viable alternative. On the subject of live view, the M’s implementation makes a lot of sense: for viewing, it shows a clean image; when the shutter is half pressed, it previews the shooting exposure. (Of course, you’re always looking at the lens stopped-down as there’s no mechanical connection between lens aperture mechanism and the camera body.) This is a very clever, useable implementation and begs the question: why do I have to choose between viewable image or preview only with my Nikons?

_M240_L1002618 copy

I was left with mixed feelings from the EVF experience, though. On one hand, it’s great to be able to focus anywhere in the frame and have a magnified centre zone (apparently technical limitations with the sensor mean that live view magnification is restricted to the centre portion of the image only, which may cause issues when shooting fast lenses with field curvature wide open) – but on the other hand, it just feels wrong. If I use my right eye with the EVF, my nose goes into the optical finder window, which means that it becomes dirty and hard to see through afterwards; and then there’s the previously mentioned issue of microphone placement. (Why didn’t they just put it at the front of the camera where the RF frame line illuminator patch used to be?) Don’t get me wrong – the EVF itself is excellent; high resolution, of reasonably natural contrast and dynamic range, and with a pretty good refresh rate (though nowhere near as fluid as the high-speed 120fps mode of the OM-D).

_M240_L1002320 copy

There’s also a bit of a wonky bug in the way the camera picks a display – it’s the last one used, not the last one used for a given mode. So if you were using live view on the EVF, it’ll playback there too unless you manually switch over., which can be rather annoying at times. Focus peaking works, but it could probably use a bit more customization – more or less sensitive, thicker outlines, the ability to change colors etc. Note that the sensor does not have an electronic first curtain, which means there’s a small but perceptible lag whenever you shoot in live view or use advanced metering with the rangefinder (it meters off the sensor) – for this reason I prefer to use the normal optical finder and classic metering (which is restricted to centre weighted). In short, there’s nothing wrong with it other than my preconceptions that this should still be a rangefinder camera. Fuji’s Hybrid Optical Finder would probably feel right at home here. Assuming of course that either party would play nice with technology sharing.

_M240_L1000479bw copy

I actually wonder if the appearance of the EVF on an M camera means that the rangefinder’s days may be numbered; the reality is that the system requires very precise calibration, is prone to drift, is limited when it comes to zoom lenses, long lenses or off-center subjects, and is manual focus only. It made sense back in its heyday, and personally I think there are enough advantages to it to make it preferrable – the size and clarity of the view, the ability to see outside the frame, and the responsiveness of hyperfocal/ zone/ manual focusing – but what we really need is something that’s the best of both worlds. Perhaps Fuji is going in the right direction after all. More interestingly, it seems that the idea of cross-system compatibility as a whole is coming of age; first with Micro Four Thirds and the other mirrorless cameras, and now with the full-frame M 240. We are no longer restricted to lenses from one manufacturer on one body – it’s great because it means we can cherry-pick the best of everything, providing you have the right adaptors and a short enough flange distance on the body you’re mounting things to.

_M240_L1000919bw copy

Of course, the idea of full cross-system compatibility and backup would be uselessly impractical if the non-system lenses – especially wides – didn’t play nice; I’m pleased to report that isn’t the case. Edge performance is acceptable for most lenses, and fairly close to the lenses on their native mounts for the more telecentric designs such as the Zeiss Distagons. I tested the Zeiss ZF.2 2.8/21 and 2/28 Distagons with no issues; the 2/50 and 2/100 Makro-Planars were also excellent performers. Out of curiosity and in the interests of science, I’m pleased to report that the Hasselblad Zeiss CF 4/50 FLE, CF 2.8/80 and CF 4/120 Makro-Planar all work well too…even if they look rather ridiculous due to their size and the need to use multiple adaptors (Hasselblad V to Nikon F, Nikon F to Leica M). This says that the redesigned microlenses are working: legacy M glass looks great, too – the images in this review were shot with the 28/2 Summicron-M ASPH, 50/2 APO Summicron-M ASPH (reviewed here) and Zeiss ZM 2.8/28 Biogon. Incidentally, the 50 AA really shines on the M 240′s sensor – if anything, it confirms the mastery of this optical design (if not justifying its very high price). Other lenses don’t appear to be any poorer, but it could also be because there’s very little difference in real linear resolution between 19 amd 24 MP.

_M240_L1001511 copy

It’s only natural for me to want to compare this camera to the current benchmark in its sensor class: the Nikon D800E. I don’t think anybody would argue about that camera’s resolving power, color accuracy or dynamic range; it’s also a camera I’m very familiar with as it’s been my workhorse since it went on sale in April 2012. In short: the M 240 compares favourably. In fact, I think it outresolves the other 24MP DSLRs thanks to its lack of antialiasing filter; there’s a crispness present which certainly isn’t there on my D600. There’s of course no way it can beat the D800E due to sheer pixel count, but the reality is that the linear difference in resolution isn’t quite as much as you think – about 22% linearly. Far more important is the pixel-level quality of the files.

_M240_L1001563 copy

The good new is the M 240 does very well here. It’s pretty close to the D800E in acuity; perhaps both cameras are pushing the limits of what can be squeezed out of a Bayer-type array. ISO sensitivities run 200-6400, with a PULL 100 mode. At base native ISO – 200 – I think useable dynamic range matches that of the D800E; depending on how you process the DNG files, you’re looking at somewhere in the neighbourhood of 13-4 stops. Rarely did I have situations where I clipped highlights or lost shadows, and this is shooting in bright tropical sun where ‘Sunny 16′ should be more like ‘Sunny 32′. Recoverable dynamic range from the raw files is definitely shadow biased; you might get 2-3 stops there, but only 1 (or less) out of the highlights, which clip with a moderately harsh transition if you pull the recovery sliders too far. Needless to say, there’s easily a gain of a stop or two on the M9, and you don’t get the abrupt ‘tearing’ or ‘bleeding’ artefacts seen when the M9′s CCD saturates – sun in center frame is a good example.

M240 noise test
ISO comparison series. Click here for the full size screen capture made up of 100% crops.

It’s a different story at higher ISOs, though; it seems that you’re basically losing one stop of dynamic range for every stop in sensitivity gain, and a bit more at the 3200 and 6400 settings because the noise floor increases dramatically; by the time you hit 6400 I’d say there’s no more than 6-7 stops of useable dynamic range. There’s also some faint shadow pattern banding at 3200 and 6400 settings. ISO 6400 is still useable if you expose properly – highlights remain clean – even if the shadows turn into a murky mess and must be crushed to reduce visibility of banding. Pixel-level performance is roughly comparable to the D600 and D800E (minus the banding), and about 2-2.5 stops ahead of the M9. Not bad at all considering the pixels got smaller, too.

_M240_L1000044 copy Might not look it, but it was in a dark corner – at ISO 4000.

One of the bigger debates raging across the internet is whether anything will be lost in the transition from CCD to CMOS architecture; the former tends to have a much more filmic response than the latter. I know that the raw tonal response of the M8/ 9/ Monochrom – Kodak CCD based with the same architecture – is definitely more pleasing than the D800E, especially in the quarter tones, which just seem somehow richer. The D800E of course has much more latitude for adjustment, but it does require some work to get similar tonal quality. (As a result, output tends to look a little flat.) I’m definitely not a fan of the relatively unforgiving latitude and poor signal-to-noise ratio at higher sensitivities, though. It appears that the M 240′s new sensor sits somewhere between the two camps, even if the architecture is ostensibly CMOS.

_M240_L1000033bw copy

We have a sensor that has some of the tonal response – i.e. nonlinearity – of a CCD, which means it produces nice quarter tones; but some of the latitude and low noise of a CMOS. The tradeoff appears to be a similarly nonlinear decrease in dynamic range as the sensitivity gets turned up. In some ways, the rendering quality of the sensor reminds me of the Nikon D2H’s JFET LBCAST sensor – which itself was supposed to be a hybrid design – right down to the way you can have four perfectly clean highlight stops at high ISO, acceptable midtones, and then the shadows turn to mush. Fortunately, the usable ISO ceiling isn’t restricted to about 800 or so – on the M 240, that’s the point at which you start to notice there’s some noise in the shadows. It doesn’t actually ever become objectionable because the highlights remain clean, but it’s definitely there, and not always monochromatic, either.

_M240_L1004744 copy
Saturated reds: a bit hot.

The jury is still out on color, for the main reason that Adobe has not yet released a set of profiles for the camera; as such, I’ve been looking at DNG files which have truly ‘raw’ color output with no grading or profiling whatsoever. In the course of testing and reviewing, I created my own color profiles to address this – the native response of the camera is to have strong yellow response and saturated reds that shift slightly towards pink. It’s not at all accurate, and requires some considerable work to correct. I can only hope that this improves once we have official and properly calibrated profiles to work with; I’ll reserve final judgement until then. Bottom line: as it stands, the M 240 doesn’t have the same color response as the M9, because my profiles for that camera produce slightly strange results when used on M 240 files. I would describe the M9′s files as ‘cool’ and ‘light’, with colors that tend towards richness when saturated. The M 240 is warmer and more saturated overall, but without the flatness of the D800E’s raw files; the tonal map is closer to the M9′s CCD.

_M240_L1000317 copy

Interestingly, the M 240′s files are very good candidates for black and white conversion; straight desaturation of a raw file results in nice quarter tones and smooth tonal ramps. In fact, it’s not far off the M Monochrom in this area; although the Monochrom will still hold a slight advantage in resolved detail due to the lack of Bayer filter, the high ISO advantage it previously enjoyed over the M9 is gone: top ISOs of 6400 on the M 240 and 5000 on the M Monochrom look pretty much the same, both in terms of noise and dynamic range. Unless you’re a real low-ISO black and white connoisseur, I’d venture as far as to say that the M 240 can match the M Monochrom for the vast majority of situations, and with the added benefits of all of the other usability improvements and being able to shoot color . It also does no harm that it’s a bit cheaper, too.

_M240_L1000203 copy

I’m not going to comment on video performance because it’s not my area of expertise; I’m going to leave this to others who are more knowledgeable about these things.

I admit that I was initially very worried about dilution of purity with the new M, which is admittedly a rather nebulous concept. I’ve always thought of the M cameras – film or digital – as the last bastions of pure photography, in that the electronics and extraneous features/ controls/ bits were always kept to the bare minimum. The M8/9s were perhaps the only cameras that retained manual focus only, mechanical aperture dials, and a direct shutter speed dial – you could shoot them without ever entering the menu more than once, if you so desired. My initial reaction to the M 240 was a slight queasiness and feeling that the line had somehow been bastardized by the addition of video and electronic finders (it’s a rangefinder camera! M stands for rangefinder, in German! What on earth were they thinking? Etc.) – live view I can live with, and is especially helpful for determining if a lens is soft or if it’s merely your rangefinder that’s out. After using the camera for some time, I think this is simultaneously true and untrue: I don’t like the EVF experience, but I suppose it makes sense and you have the choice to use it or not.

_M240_L1002956 copy

In that respect, the M 240 delivers on a level that’s at least one, if not two, complete generations ahead of the M9; it finally feels like the M system has come of maturity into the digital age. Unlike the earlier digital Ms, the camera no longer feels like the limiting factor – barring startup delays – it really does feel like the time when Nikon went full frame all over again. Leica has come under a lot of fire for the limitations of the M8, continued limitations of the M9 and somewhat stopgap means of addressing high ISO performance with the Monochrom; I freely admit that QC issues with the M8 and lenses at the time forced me to abandon Leica at the time, and I’ve had a love-hate relationship with the M9-P – loved the tactility and experience of shooting it, hated the unreliability and high ISO performance. I am as impressed with the image quality as I am with how much difference all of the little changes make towards overall usability. Yes, there are still things to be improved – ergonomics (that damn right strap lug!), microphone placement, EVF behaviour, colour – but for the most part, the M 240 shows Leica are firmly back in the game. MT

I will be posting plenty of additional test images from the camera over the course of the next few weeks to my Flickr page – there’s a dedicated Flickr set for the M 240 test here.. Note: please look at the original size images on Flickr (clicking through the images will get you there) – their resizing algorithm seems to introduce some haloes at smaller sizes. Original doesn’t show these.

Update (23/2/13): Fellow testers Sean Reid and Jonathan Slack have also published their thoughts – you can find them at their respective links.

The Leica M Typ 240 is available here from B&H here in black and chrome, and Amazon here in black and chrome.

____________

Visit our Teaching Store to up your photographic game – including Photoshop Workflow DVDs and customized Email School of Photography; or go mobile with the Photography Compendium for iPad. You can also get your gear from B&H and Amazon. Prices are the same as normal, however a small portion of your purchase value is referred back to me. Thanks!

Don’t forget to like us on Facebook and join the reader Flickr group!

appstorebadge

Images and content copyright Ming Thein | mingthein.com 2012 onwards. All rights reserved


Filed under: Gearhead: Reviews, Leica

Lens review: The Leica 35/1.4 Summilux-M ASPH FLE

$
0
0

_7063668 copy
I couldn’t find a product shot in my archive, so you’re going to have to settle for one of me using it instead.

Not long after this lens was initially released and generally available – early 2012 – I published a guest post review here on the Leica Blog. At that point, I’d had no more than a couple of weeks to shoot with the lens, and certainly not under any kind of duress or pressure. Since then, I’ve both encountered many situations with the lens and used it as pretty much the go-to on my M9-P in the hopes of making 35mm one of the intuitive focal lengths in my repertoire. It didn’t stick, and somewhere in the middle of last year, I landed up selling it to one of my students.

_M9P1_L1014964 copy
Diner. All images in this review shot with the Leica M9-P except where otherwise noted.

I’ve been meaning to do a full review for some time now, but the reality is that there have been many other things which have gotten in the way – or perhaps I should stop making excuses for being lazy.

The 35mm f1.4 Summilux-M ASPH FLE is version seven in a long and distinguished line of lenses – some may even think of them as legendary and quintessentially Leica. They’ve grown larger, heavier and more expensive as time moved on – earlier versions were practically pancakes compared to the 35 FLE, but admittedly they were also relatively poor performers at maximum aperture. The previous version (VI) featured a single aspherical element (there was a very rare double aspherical version produced too, relatively early on in the life of this lens) and was known for being both an excellent optic, but hamstrung by one huge flaw: focus shift.

_M9P1_L1014980 copy
Saute

Focus shift is when the focal plane changes distance on stopping down, even though the lens elements aren’t moved. This typically happens in fast, non-symmetric lens designs. In practical terms, it isn’t an issue with mirrorless cameras because they’re always focusing at shooting aperture anyway and on the sensor plane; for SLRs, you focus wide open and need to take into account shift when stopped down (DOF preview helps here); for rangefinders, you’re mostly out of luck since you never see where your depth of field plane lies anyway. Basically, the 35 ASPH VI could be calibrated to focus perfectly wide open, or stopped down slightly; at much smaller apertures (8 onwards) it’s a wash anyway as the increase depth of field covers any movement in the focal plane. In my limited experience with the VI, the shift was very noticeable and quite a pain since correct calibration for all of my other lenses would correspond to slightly stopped down for the 35; I landed up selling it and getting the 35/2 ASPH instead, which is both an outstanding optic and exhibits no focus shift.

_M9P1_L1013119 copy
Reflecting

The new 35 FLE (VII, code 11663) retains the same fundamental 9/5 optical design as the 35 ASPH VI, except for one important difference: a number of elements – the rear group, I believe – move separately from the front elements to correct for focus shift, especially at close distances. Both lenses have concave front and rear elements. As a result of the secondary helicoid, the focusing action is definitely stiffer than the old lens, especially when new. Some use will help the lens to break in and acquire the perfect amount of resistance, however – mine certainly did. (As always, it goes to prove that practice improves your photographic experience…)

_M9P1_L1011571 copy
Cigar man. From my recent exhibition

The inevitable question is ‘does the FLE group work as intended?’ The short answer is yes – you can stop reading here if that’s all you wanted to know and you were otherwise happy with the older lens. There’s a noticeable improvement in practical image quality close up and/ or wide open; partially because I feel the optics of this version have been somehow refined, and partially because it’s now easy to hit perfect focus even when the lens is used wide open. In several thousand images shot with this lens, I haven’t seen any evidence of focus shift.

_M9P1_L1010327 copy
Sometimes it’s best not to look up

As far as resolution goes, the lens – my sample at least – exceeds the 35/2 ASPH at every aperture, and seems to have a slightly crisper rendition with improved microcontrast. All in all, an impressive performance. Color rendition is neutral, and takes cinematic color shifts in processing well. Corner performance is almost as good as center performance, with only very slight softness and lateral chromatic aberration visible on high contrast edges when shot wide open; both markedly improve at f2 and match the center at f2.8. Overall, it seems to match the rendition of other Peter-Karbe era lenses very well; I’d say its character is closest to the 50/1.4 ASPH in rendition, splitting scenes into clean, pleasingly cinematic planes regardless of aperture. Subjects stand out with a very three-dimensional rendition thanks to the excellent microcontrast and low presence of CA, though overall contrast seems to be slightly lower than the 50/1.4 ASPH and 35/2 ASPH – not necessarily a bad thing to aid retention of dynamic range on digital. There’s also very little field curvature that I can see.

_M9P1_L1013197 copy
Sunset over the Gulf of Thailand

The look of modern Leica lenses is defined as much as by the out-of-focus areas as those that are in focus. Whilst a number of aficionados, shooters and pundits alike wax lyrical about the quality of the bokeh defining the various eras in lens design, I think the focal transition zones are much more telling. The rendition of edges in that zone – specifically, the presence of lateral/ longitudinal chromatic aberration and double imaging, and the abruptness of the transition – says a lot about both the design of the lens, and its overall character. In this way, the new-era aspherical Leica lenses all share the same characteristic of having a very fast, clean transition between zones; this is perhaps typified by the 50/1.4 ASPH. I’m sure Erwin Puts and others would have far more detail to add, but this level of understanding is probably sufficient for your average photographer.

_M9P1_L1011866 copy
Puddle

In practical terms, it means that you probably want to choose a set of lenses based on the look you prefer. Earlier, Mandler-era lenses with shallower, more gentle transitions between zones tend to be appear generally softer and of lower contrast, though this doesn’t mean the in-focus areas have any lower resolution than later ASPH optics. In contrast, the ASPH designs have a much faster, more abrupt – transition, which slices your scene neatly into planes of focus. It’s cleaner, but I personally find suits the digital medium much better than film because the distinct-edges work together with the discrete pixels of the imaging medium to create a doubly-sharp impression. I personally prefer to use ASPH glass on digital cameras and Mandler-era on film.

_MM1_L9995470bw copy
Occulus. M-Monochrom

I haven’t said anything about the build quality up to this point, because as with all Leica lenses, it’s pretty much a non-issue. The 35 FLE is a heavy, solid lump of machined aluminum (I can only imagine how heavy it would be if they did a chrome version with a brass substrate) that doesn’t clunk or rattle when shaken. The two controls move smoothly; my aperture ring could have used more resistance though; it was a bit too easy to move from setting to setting accidentally. As mentioned earlier, you do need to work the focusing ring to break it in; otherwise using the focusing tab can result in some unpleasant bruises on your finger. I’m actually a huge fan of focusing tabs because they make things so much faster in practice, especially on a well-used and smooth lens.

_M9P1_L1015054 copy
Fergus Henderson in action

The other huge improvement over the 35 ASPH VI is the hood: no longer is it an enormous clip on plastic monstrosity that both somehow manages to be stubborn (when you want to take it off) and easy to lose/ crack (when you have it in your camera bag) – and to make things worse, it also massively obstructed the viewfinder. Instead, we get a streamlined hood that screws on, managing to stop with perfect alignment thanks to cleverly machined threads; it’s got a tiny cutout in one corner to allow viewing through, but I found that the lens is best used without a hood; simply attach the included blanking ring to cover the hood threads, and use the supplied round cap (instead of that flimsy slip-on plastic thing that covers the hood). In this way, it becomes compact and doesn’t obstruct the finder at all.

_M9P1_L1010395 copy
Peter Bendheim, good friend and photographer

Out of curiosity, I tried the lens on my OM-D, expecting the same outstanding level of performance as seen on the M9-P; no dice. I was sorely disappointed, and reminded of why I dislike using non-native lenses on other systems, especially those with very short back flange distances. The microlenses covering the sensor form part of the optical system, and tend to interact in strange ways with the optics of legacy lenses. Unfortunately, it was no different here: the 35 FLE showed bad smearing and lateral chromatic aberration (plus purple fringing) and wasn’t acceptable until f5.6 or thereabouts; I can’t recommend using this lens on M4/3 – those who want a fast 70mm will have to look elsewhere.

_M9P1_L1015016 copy
You can use it for interiors, too!

I’m going to conclude this review by saying quite simply this is perhaps the best 35mm lens I’ve ever used; regular readers and those who know me will also know that I don’t make statements like this lightly. It’s an outstanding performer at all apertures, and there is effectively no penalty for shooting wide open; your rangefinder calibration and eyesight are going to make far more of a difference to achieved resolution than the aperture selected. It doesn’t quite render in the same perfectly neutral, transparent fashion as the 50/2 Summicron APO-ASPH, but it does have the same very pleasing, clean, three-dimensional quality as the newer ASPH glass – I think it would make a great companion to the 50/1.4 ASPH, 75/2 APO-ASPH and 90/2 APO-ASPH, or even one of the wider lenses like the 21/1.4 ASPH (another lens I keep meaning to review) and the 24/1.4 ASPH. If you’re a 35mm aficionado: close your eyes, gird your wallet and buy this lens, then never look at another 35mm again. It’s that good.

Note: half of the images in my exhibition Diametric Opposites were shot with this lens. All of the color ones, in fact.

The Leica 35mm f1.4 ASPH Summilux-M FLE (VII, 11663) is available here from B&H and Amazon

____________

Visit our Teaching Store to up your photographic game – including Photoshop Workflow DVDs and customized Email School of Photography; or go mobile with the Photography Compendium for iPad. You can also get your gear from B&H and Amazon. Prices are the same as normal, however a small portion of your purchase value is referred back to me. Thanks!

Don’t forget to like us on Facebook and join the reader Flickr group!

appstorebadge

Images and content copyright Ming Thein | mingthein.com 2012 onwards. All rights reserved


Filed under: Gearhead: Reviews, Leica

The recommended gear list

$
0
0

One of the things I’ve been frequently asked for is a concise list of recommended gear – preferably stuff you can still buy new – I’ve finally gotten around to creating it. This will be an updated, living document that has its own page. You can find the Recommended Gear List here. MT


Filed under: Gearhead: Reviews, Off topic

Review: The Panasonic Lumix GH3

$
0
0

_6002497 copy

I was recently loaned this camera for testing by one of my students. Due to some oddities in the distribution channel, it was first available in the US around the start of the year, and now appears to be largely out of stock or back-ordered everywhere. It still isn’t widely available in Asia. The test unit in question was loaned to me by a student, together with the 14-140 lens – available as a kit in some parts of the world.

_6002504 copy

_6002508 copy

_6002509 copy

This is not a cheap camera. The body price is around $1600, depending on where you buy it; in addition, the optional battery grip adds $300 to the price – for a total of $1900. (Update: many ave pointed out the price is 1299. At the time of writing, this was not the case. I dont think it changes the fact that youre still paying more, though. Value, as ever, remains relative.) By comparison, the Nikon D600 (which I reviewed here) is a shade under $2000, the Canon 6D is ~$1,900, and the 7D a paltry $1200. Its main competition, the Olympus OM-D (reviewed here) sells for $950. You can see why there’s a problem here: it’s got to be a much better camera than the OM-D (since for the same price as the body alone, you could buy an OM-D and a very competent 14/2.5 and 45/1.8 kit, or perhaps the 25/1.4) – this is a tough ask, because all evidence points to the two cameras having the same sensor. For all practical purposes, they have the same effective DXOMark scores, too.

_6002518 copy

_6002528 copy
The obvious comparison. Note significant difference in size: with the body cap lens, one is pocketable, and one isn’t.

Both have the same effective resolution of 16.1MP. The OM-D will do 9fps at full resolution raw; the GH3 a slightly lower 6fps, or 20fps at reduced resolution with electronic shutter. Both also have touch-sensitive and tilting monitors, with the GH3′s being fully articulated as opposed to moving in one axis only. Finally, both have built in electronic viewfinders, metal construction and claimed weather sealing – I have my doubts about this, as my OM-D experienced some issues in a high humidity environment, and the GH3 doesn’t appear to have any seals around the card compartment. You get a built in flash with the GH3, though I’d hope so: the body is enormous.

_1030097 copy

You’ll see that there aren’t a lot of images in this review: the main reason was that I really didn’t feel like shooting with the camera. This is generally rare for me, but honestly, the GH3 is one of the few cameras I’ve used in recent times that left me completely cold. I’ve never been a fan of the Panasonic UI; it’s actually gotten worse with the latest iteration, as in the interests of making the design look slick, it’s now not very clear what’s been selected, nor is it very intuitive to figure out how to move between menus and submenus – especially for those overlaid on the live view screen. However, credit should be given as there are at least ‘buttons’ marked out on the screen which makes touch navigation easy; the screen is also more responsive to a finger than the Olympus. The ergonomics of the camera leave a lot to be desired, too: though the main grip is very comfortable – amongst the best I’ve recently held – the button placement is terrible. The top deck buttons require you to move your fingers in a physically impossible way to press; the rear buttons disappear into the body and require you to hunt for them, the D-pad control dial is difficult to rotate, and none of the control dials feel particularly positive or confidence-inducing. (The OM-D might have small buttons, and some are hard to press, but I could find them by memory and touch after a few hours of shooting – not so with the GH3.)

_1030087 copy

But the worst ‘feature’ of all was the EVF. On spec, it should be good: comparable to a 0.7x (or thereabouts) full frame finder, with 1.7M dots and a high refresh rate. In use, it was horrible. Why? The final lens or optical piece or plastic bit or whatever over the EVF just before the rubber eyecup (fixed, not an option slip in, I checked) is of such low quality that if you wear glasses or move your eyes even slightly off center, the image ‘swims’ and becomes unsharp. It’s like looking through a melted piece of plastic; the view isn’t sharp or clear, and it’s very difficult to tell if the lens is out of focus, broken, or it’s just the viewfinder that’s inducing these effects. Probably the latter. You could of course just use the rear LCD, but holding such a large camera – it’s nearly the size of a D7000, and considerably larger than the OM-D – at arm’s length not only makes you look stupid, but is a surefire way to get blurry images because such a camera position is nearly impossible to stabilize. Of course, you could rely on OIS lenses, but if you’re using Olympus glass – there are no Panasonic equivalents to the 12, 45, 60 and 75mm fast primes – then you’re very much out of luck.

_1030101 copy

Finally, there’s the size issue. I just can’t figure out why the GH3 has to be so much larger than the OM-D when ostensibly, it contains the same innards. In fact, said innards may be slightly fewer in quantity given that there’s no stabilisation system around the sensor, nor does the prism hump have to accommodate a 5-axis gyroscope. The battery does hold around 50% more juice – and I was unable to exhaust it during the 300+ frames I shot during testing – which is one advantage; that said, I’ve had up to 2,000 frames on the OM-D, and 800-1000 is routinely possible. Although the body of the camera is made of magnesium, it has the same hollow, low-density feeling as the D600; it simply feels like there’s a lot of empty space inside the camera. Pair it with the 14-140 lens, and the whole combination feels front-heavy because the lens carries most of the weight. Use a smaller lens, and the combination handles better, but looks very odd because most of the M4/3 system primes are very small.

_1030113 copy

There has to be some good news here, right? Firstly, there’s a good degree of customizability in the control layout – no less than five real function buttons, two virtual on-screen buttons; a quick shortcut menu, and a healthy selection of custom functions. There is one glaringly obvious omission, though: the ability to set AUTO-ISO thresholds. There are two options for letting the camera pick the sensitivity – AUTO and iISO – neither of which are clearly explained anywhere, nor can you control the high ISO limit or the lower shutter speed threshold. This kind of omission isn’t really excusable in a camera from 2012, because it makes the feature effectively useless.

_1030116 copy

Fortunately, the camera actually does very well in the two things that matter: focusing and image quality. It focuses at least as fast as the OM-D, and in some situations, a hair faster – it’s really difficult to quantify, because both cameras are extremely fast. The GH3 just seems to hunt a fraction less than the OM-D with the same lens; it’s less noticeable on wides, and slightly more obvious on macros and teles. This gives it a very slight advantage over the OM-D when it comes to continuous focusing; that said, I still can’t make either track a moving object to the same degree of precision as any of my Nikons (D800E notwithstanding). I can’t really tell a difference between the sensors – with the same conversion settings in ACR, A-B test results look identical.

_1030144 copy

It appears that along all the dimensions that matter – color accuracy, dynamic range, acuity – they’re the same sensor. Both cameras will give excellent results to ISO 1600, good results at 3200, and are usable in a pinch at 6400 – though personally I avoid this setting as dynamic range tends to be compromised. I’d rate the GH3 as being slightly cleaner than the OM-D, however – perhaps by half a stop or so. That said, ambient lighting temperature probably has a larger effect on noise; if you stripped the EXIF and mixed up the raw file names, it would be tough to tell what came out of which camera. Both appear to have equally weak anti-aliasing filters, too.

GH3 vs OMD 200-1600
Low ISO (200-1600) comparison. Full resolution crops here.

GH3 vs OMD 3200-25600
High ISO (3200-25600) comparison. Full resolution crops here.

I’m not a video expert (or even seasoned amateur), but I do have some basic idea of what to look for; I was pleasantly surprised by how good the OM-D’s video output looked, but the rolling shutter effect with even slow to moderate speed pans was extremely obvious, regardless of lighting type (sometimes rolling shutter can be worse under phased sources). Unfortunately, the same appears to be true of the GH3: rolling shutter is equally bad. By comparison, you’ve got to be panning very quickly indeed with the RX100 to see any evidence of it at all. Aside from that, the actual video quality appears to be pretty good: compression is reasonably low, and there are few artefacts. However, I suspect that the rolling shutter issue is going to mean that this isn’t the upgrade a lot of filmmakers were hoping for.

_1030153 copy

A quick note on the 14-140 lens: it’s a surprisingly good optic, sharp across the frame in the midrange, but soft at the extreme ends due to lateral CA and what appears to be internal flare or ghosting at times. It’s definitely useable wide open – and it’d better be, because the very modest maximum aperture means that you’re already pretty much at the diffraction limit without stopping down. Also, you’re probably going to want as much light as you can get to keep noise at bay once the light gets low. This lens has a reputation for being versatile for video work, and I can see why; however it wouldn’t be my first choice for stills, as it’s both expensive and heavier than a 12/2+45/1.8 (or 60/2.8) pair, without offering anything close to the same optical quality.

_1030141 copy

In principle, there are few real differences between cameras these days – many even use the same basic components – which means that so much of whether a camera ‘works’ for you or not boils down to its handling, UI and general feel in the hand, and if there are any small make-or-break quirks. (I go into far more detail on this topic here). I think the problem with GH3 is that it feels far too much like a piece of consumer electronics, and not enough like a camera. It really doesn’t feel like there was any photographer input during the development process, or the photographers who were involved were of the hipstagram generation and don’t remember that plenty of very responsive cameras were produced without an on-screen menu. This permeates throughout all aspects of the camera – from the feel of the buttons (hard and shallow, no positive clicks) to the menus, UI and overall control logic: it just doesn’t feel like a well-thought out product, and isn’t at all intuitive in use. Don’t get me wrong: I have no doubt that the imaging potential is there – it should be, given the sensor’s provenance – and some will find the operation of the camera to suit their shooting style. Don’t get me wrong, it’s not a personal bias because I very much like some of the company’s other products – the LX series, for instance – but the GH3 just left me cold. MT

If you must have one, the GH3 is available from B&H and Amazon. Ditto for the OM-D (B&H, Amazon), D600 (B&H, Amazon) and 6D (B&H, Amazon).

____________

Visit our Teaching Store to up your photographic game – including Photoshop Workflow DVDs and customized Email School of Photography; or go mobile with the Photography Compendium for iPad. You can also get your gear from B&H and Amazon. Prices are the same as normal, however a small portion of your purchase value is referred back to me. Thanks!

Don’t forget to like us on Facebook and join the reader Flickr group!

appstorebadge

Images and content copyright Ming Thein | mingthein.com 2012 onwards. All rights reserved


Filed under: Gearhead: Reviews

Packing for the USA

$
0
0

_780_IMG_1448b copy
On the road again.

One of the conundrums I always face before a trip of any sort is the question of what gear to bring. It isn’t so much of a problem if I’m on assignment, because what I need is dictated by the brief of the job, but it’s a completely different story when I’m teaching, or worse, travelling for myself. I suppose it’s a problem faced by anybody who’s got more than one complete set of gear. There was a time when I used to simply take every (or nearly every) lens I owned – whilst this would ensure that you’d never miss an opportunity, it’s also a great way to rack up chiropractor bills and ensure that you really don’t enjoy your trip. Lugging everything from place to place becomes a chore, and taking photographs turns into a burden rather than a joy.

Needless to say, I’ve since travelled as light as possible – first with a D700 and a couple of fast primes; lately with a compact and one system camera. In fact, the majority of my recent workshops have been done with this setup – typically an OM-D, the 12/2 and 45/1.8 primes, and something else to fill the pocket for quick grabs. The trouble is, I’m starting to become accustomed to the image quality of the D800E and Hasselblad systems; my recent trip to Fukuoka brought this home in a big way. Whilst I loved the compactness and flexibility of the D-Lux 6, (and that thing has one amazingly good lens) the image quality at anything above base ISO (80) left a lot to be desired; not only were the files pretty small, but the pixel quality simply wasn’t there. Is there any reason why you couldn’t produce great pictorial results with this camera? Absolutely not. It was satisfying to use too, but I could never quite shake the feeling of wishing I’d had something with a bit more resolution instead.

My upcoming USA trip is going to be a mix of teaching and personal shooting; both requirements are flexible enough that I could pretty much use anything, with the caveat that I’m going to be carrying it around in my hands for 16 days, so every superfluous ounce is eventually going to make itself noticed (and probably regretted). The contenders looked like this:

  • Nikon FX body (D800E or D600) and AFS 24-120/4 VR
  • Nikon FX body, AFS 28/1.8 G and AFS 85/1.8 G primes
  • M4/3 system
  • A compact of some sort
  • Hasselblad 501C, 50/80mm lenses, film
  • Hasselblad 501C, 50/80mm lenses, CFV-39 digital back
  • I want to say Leica M and 28/50mm lenses, but I don’t have one yet.

As much as I’d love to take the ‘blad, using film would be solely for my personal work, which means that I’d have to still carry another digital system of some sort. Plus the number of airport scans I’d have to go through – I estimate about a dozen based on the airports I’m familiar with – would mean risking fogging on return. Not to mention having to carry a lot of film. For similar reasons, I’m not considering 35mm film either. Borrowing the CFV-39 digital back again is an option (and I’m thinking about trying it out again now that the previous focusing issues have been resolved) – but it’s not hugely practical, or stealthy. Not to mention heavy and very power-hungry; scratch that.

On the same rung for image quality is the Nikon FX option; the trouble is, I laid out both zoom and prime kits next to the ‘Blad while packing for Fukuoka, and guess what: the ‘Blad was lighter and smaller. No denying that the 24-120 would give me the most flexibility, at the expense of a couple of stops of light. Primes would give better image quality and more light, at the expense of bulk and a bit of weight. I’m still not a big fan of the ergonomics of the D600, and as far as I’m concerned, that takes it out of the equation. The D800E needs all the shutter speed it can get, so it would be a prime solution, and perhaps paired with a tripod, too.

This is beginning to sound like the gear I’d take for an assignment.

I’d love to go with the new M, but since nobody seems interested in selling me a camera (several of my readers in the region reported being very annoyed that Leica Singapore auctioned off all their early stock instead of fulfilling their back order list) that really isn’t an option, either. In the meantime, my M lenses go unloved. Guess what: this brings us right back to what I usually pack – the OM-D and 12/45 or 12/60 primes. I actually haven’t shot with this combination in a while, so I should probably spend a bit of time reviewing files and making sure that I’m not going to experience the same disappointment at opening the D-Lux 6′s images. I would have rounded things out with a compact – either the Fuji X20 or Coolpix A, but neither review unit arrived in time. I have a feeling the latter might land up replacing a lot of things if it’s fast enough: my compact, my 12/2, my 28/2 Summicron, and my GR1v. A large-sensor pocket 28mm camera has been on my wish list as long as I can remember.

I don’t think I’ll bother bringing a tripod (since every time I do, I never use it) or film (scared of the X ray machines still); the laptop and Wacom are both a given since I’m teaching, along with a spare hard drive, batteries and memory cards – but that’s probably going to be about it, I think; just enough to fill out a couple of jacket pockets nicely. And my wife says I complain about her clothes packing decisions…MT

____________

Visit our Teaching Store to up your photographic game – including Photoshop Workflow DVDs and customized Email School of Photography; or go mobile with the Photography Compendium for iPad. You can also get your gear from B&H and Amazon. Prices are the same as normal, however a small portion of your purchase value is referred back to me. Thanks!

Don’t forget to like us on Facebook and join the reader Flickr group!

appstorebadge

Images and content copyright Ming Thein | mingthein.com 2012 onwards. All rights reserved


Filed under: Gearhead: Reviews, On Assignment

Review: The Leica D-Lux 6/ Panasonic LX7

$
0
0

_RX100_DSC3814 copy

There aren’t that many choices for fully-featured, pocketable compacts at the moment; in my ongoing quest to find the ideal take-everywhere companion, I’ve probably tried most of them. Current top of the heap is the Sony RX100; I’ve also used the GR-Digital series, Fuji XF1 and Panasonic LX/ Leica D-Lux series. For whatever reason, I’ve never really bonded with the Canon S-series, so that’s never made it into my pocket; same with any of the Nikon Coolpixes, though I’m really hoping the A will change that. Whilst I loved the RX100 for its fantastic sensor, the lens arguably lets the package down: it may be fast one the wide end, but for it to keep up with the sensor in the corners, you have to stop down a bit (thereby negating this advantage) and the tele end is just plain slow.

_DL6_L1000501 copy
First signs of sakura season

Regular readers will know I’m a firm believer in carrying a camera at all times; the question is, what should that camera-for-when-you-don’t-want-to-carry-a-camera be? Let’s just say the hunt goes on. As part of the quest, I borrowed a D-Lux 6 from Leica Malaysia to put it through its paces on my recent trip to Japan. Thanks to an enormous work backload, I’ve only just had a chance to finish looking through the files in detail.

_DL6_L1000118 copy
People’s park

First off: I’ve had a lot of people asking if the Leica version is any different to the Panasonic version. Physically, they are identical but for the cosmetics – the Leica has a nicer, cleaner (but also slipperier) design and square buttons. The Panasonic has a few more curves, flourishes, chrome bits and a small but welcome front grip. Menu cosmetics are different. Both have identical sensors, lenses, EVF capability, and as far as I can tell, file output. The Leica version is more expensive, but includes Lightroom and an extended warranty; in the end, it washes out price-wise. Buy the Leica if you need processing software or intend to keep the camera a bit longer; the warranty helps and it holds resale value a bit better, too. I reviewed this version because it’s what I happened to have access to.

_DL6_L1000455 copy
Yahoo! Dome and cloud, home of the Fukuoka Seahawks.

The headline spec for both cameras is the lens: a 24-90mm f1.4-2.3 (!) diagonal 35mm equivalent – I’ll explain this in a minute – Leica-designed ‘Vario Summilux’. It’s coupled to a 1/1.7″, 12MP sensor that never outputs more than 10MP; this is because the diagonal angle of view of the lens is always constant, so the image circle is slightly larger than the sensor. This means that the horizontal field of view actually gets wider as your change aspect ratios (on a handy slider on top of the lens barrel) rather than merely cropping – the 16:9 option has the horizontal angle of view roughly equivalent to a 21-22mm in 35mm terms. It is supposedly an updated version of the sensor in the predecessor (LX5, D-Lux 5). I used one of these extensively and loved the optical quality of the lens and its close focus ability throughout the entire zoom range; fortunately neither has changed.

_DL6_L1000138 copy

Shooting with easily-switchable multiple aspect ratios is an interesting experience. I’m used to this normally – my Nikons are 3:2; my Hasselblads are square; my OM-D is 4:3. I regularly compose and crop to 16:9. So in theory, the Swiss Army Knife switch should be perfect for me. In reality, I found it a little disorienting to use, because it distracted me from forcing myself to compose for the aspect ratio. It doesn’t help that if you normally crop down, then either the horizontal or vertical angle of view stays the same – this is obviously not the case with the DL6/LX7. I found my compositions were much stronger if I just picked one aspect ratio and stuck with it – for most of the trip, this happened to be square since I was also shooting with the Hasselblad.

_DL6_L1000281 copy
One of the city’s famous yatai stalls.

Physically, the camera is a little larger than its predecessor; the mode dial is a little stiffer, it’s gained another thumb jog-tab on the back to activate the ND filter or change focus distance; some of the menus are a little different, and the big change is of course the addition of a physical aperture ring. It’s also a bit larger than the RX100. It still takes the same tilting EVF, which is welcome as it improves the overall stability and low-light usability of the camera dramatically. Too bad it also adds considerably to the price and bulk of the package, too. The battery is carried over from the previous version, which is a good thing for those who are upgrading and happen to have spares lying around.

_DL6_L1000212 copy
In thought

I have to be honest: there are three things I really don’t like on the DL6/LX7, and they’re all related to the mechanical operation of the lens. First is the manual lens cap, second is the aperture ring, and third is the glacial slowness of the lens to zoom. The first two are actually related; let me explain. Though I’m used to lens caps with all of my other cameras, not having to deal with one on the RX100 means that it’s possible to do single-handed grabs where you draw, hit power, and shoot all in one action. Having to remove a lens cap first and then slide a switch is akin to remembering your wadding, ramming the ball and rod, then remembering to check your flint before priming the pan. It’s just annoying on a compact. (You also have to remember to hold it out of the way so it doens’t inadvertently get in the shot.) You’re probably thinking that there isn’t room to put a retracting lens cap in since the front element is so damn enormous, but you’d be wrong: if they didn’t have the aperture ring – which is pointless on a compact because you have zero depth of field control at these kind of focal lengths anyway, regardless of the lens speed – then there’d be room for a sufficiently large retracing lens shutter.

_DL6_L1000161 copy
They managed put a retracting roof on the Yahoo! dome…but not the DL6/LX7′s lens.

That said, I’d be willing to suffer all of this and more, simply because the lens is so darned good. This is quite possibly the best lens ever fitted to a compact, and impressive in the pantheon of greats in its own right: you get sharp corners and very little lateral CA at f1.4 and full wide, which is an impressive performance indeed. Other than those corners, there’s no loss of resolution anywhere due to chromatic aberration; at base ISO, pixel-level results are so crisp that you’re left wondering if the camera has an AA filter. Even more impressively, there’s no visible penalty in closeup performance despite the speed of the lens; the camera focuses very close at all focal lengths, and extremely close – front element nearly touching subject – at full wide. (I can’t actually think when you might use this, as perspective distortion is horrible and proper lighting is nearly impossible, but that doesn’t mean somebody else can’t find a use for it.)

_DL6_L1000240 copy
Meet us at the big yellow bottle

I didn’t see any weak spots in the range, either; the lens is easily the best part of the optical system, and complemented well by a very effective stabiliser. I still think Panasonic does the best optical stabilizers in any compact; they’re easily good for another 2 stops over that fitted to the RX100, for instance. Put it this way: it appears the camera’s designers placed so much emphasis on the resolving power of the lens that there’s a built in 3-stop ND filter to allow use of the lens wide open, the menu has an option to choose whether program mode follows a generic option, an optimal MTF option(!), or tries to keep things at maximum aperture. Speaking of aperture, the aperture ring is only active with A mode selected on the dial (why they didn’t make this a position on the ring like previous Leica digitals is unknown); in every other position, the ring does nothing. If the selected aperture on the ring is wider than possible at the chosen zoom setting, the camera will just open the lens up fully.

DL6-RX100 noise comparison low iso
DL6-RX100 noise comparison high iso
ISO comparison against the RX100: both shot raw, opened in the latest version of ACR with all settings at default zeroes. No NR or sharpening. RX100 images downsized to match the DL6 in size, with the DL6 set to 3:2 aspect ratio to match the RX100. Exposure for the beginning image was 2s f2.8 ISO 80. Full size 100% crops are available here (low ISO) and here (high ISO).

The real weak spot in the imaging chain is the sensor. Though it’s an updated design (mainly focusing on throughput speed – the DL6/LX7 does 1080p60 and 11fps at full resolution), the base 1/1.7″ unit has been around since 2008 in the LX3. Back then it was an impressive piece of hardware for a compact – offering a good-quality ISO 400 and usable-in-a-pinch ISO 800, with about 11 stops of dynamic range – today, it’s decidedly ordinary, especially in the face of sensors like the 1″ 20MP, 10fps, 14bit unit in the RX100. I don’t honestly think the imaging characteristics have improved much since then: it wasn’t bad, but it’s certainly no longer state of the art, and I think I’ve been spoiled by the Sony.

_DL6_L1000495 crop
Look at that resolving power!

At base ISO – 80 – you get hints of what the lens is capable of; it’s easily outresolving the sensor by some considerable margin. Too bad you can also see traces of an underlying noise pattern, too. There’s one final fly in the ointment: be careful if you’re shooting with the sun directly in the frame; at the wrong angle, there’s the possibility of internal reflections off some part of the optical system, resulting in series of magenta blotches (see below). However, this is extremely rare and I only saw it a couple of times after deliberately pointing the camera into an exposure that was easily 1/4000s f8 ISO 80.

_DL6_L1000008 copy
Radial pattern of magenta blotches.

All that said, the lens and IS system mean that the DL6/LX7 isn’t as bad in low light conditions as you might think; in fact, it’s surprisingly good. I almost never had to go over ISO 400 thanks to the extraordinary light-gathering ability of the lens; with the RX100, I’d probably be at 3200 and wishing for a bit more. There’s no arguing that the sensor is probably three stops or so behind the RX100; however, at the long end, you’ve already lost slightly over two stops on the lens (f2.3 vs f4.9) and you can claw back another stop or more from the IS system. As you can see from the sample crops, things become a bit more complicated still: downsizing the RX100′s files result in crisper images up to a point, but there also seems to be something muddy in there eating up fine detail, too – perhaps it’s the non-cancelable noise reduction, even when shooting raw.

_DL6_L1000377 copy
Night by the river. 1/4s, handheld.

To be honest, I came away from my experience with this camera more perplexed than ever. Some of the files at base ISO blew me away; for an 8MP (or thereabouts, depending on the aspect ratio) file, the detail resolved was incredible. The lens is quite possibly the best ever fitted to a compact, and one of the most impressive zooms I’ve ever shot with (24-90/1.4-2.3 on a DSLR, anybody? M43 even? I didn’t think so). It’s fast and responsive; very nearly as fast as the RX100. It also also has superior close focus ability – handy if you’re using it on a trip to document the various objects you see and eat*. We have some operational niggles like the lens cap and slow zooming, and the disappointment in the files at ISO 800 and beyond. You’ll notice I didn’t say anything about battery life or usability; the former is excellent (I shot up to 400 frames in one day with the EVF, and the 3-segment gauge didn’t move off full) and the latter is relatively transparent – set what you need to set, use the quick menu or programmable function keys for everything else. Or just run it in RAW, program mode, and spot meter like I did.

*I used a D-Lux 5 with a couple of creatively-deployed LED panels to photograph food with great success; you can see some examples here.

As usual, the final verdict on this camera boils down to a question of tradeoffs. Do you want flexibility in the lens, or does ultimate technical image quality (sensor) matter more? I have to say that if you have no intention of printing over 13×19″, then this makes a fantastic travel companion that will do excellent macro work at a push. The RX100 will go much larger – I’ve done 20×30″ – but suffers from terrible close up performance (both distance and clearly non-optimized optics) and a slow telephoto end due to the physical size requirements of a longer focal length to cover a larger sensor at a given angle of view. I’d love to see the DL6/LX7′s lens paired with a better sensor; this combination has the potential to do some amazing things. Until then, it’s worth taking price into consideration: whilst the Sony is still over $600, the Panasonic version has now fallen to below $300 – and that makes it a heck of a lot of camera for the money. MT

The Leica D Lux 6 is available here from B&H or Amazon
The Panasonic LX7 is available here from B&H or Amazon.

Thanks to Leica Malaysia for the loan camera.

____________

Visit our Teaching Store to up your photographic game – including Photoshop Workflow DVDs and customized Email School of Photography; or go mobile with the Photography Compendium for iPad. You can also get your gear from B&H and Amazon. Prices are the same as normal, however a small portion of your purchase value is referred back to me. Thanks!

Don’t forget to like us on Facebook and join the reader Flickr group!

appstorebadge

Images and content copyright Ming Thein | mingthein.com 2012 onwards. All rights reserved

_DL6_L1000520 copy
Cubist hotel

_DL6_L1000064 copy
Inside the Fukuoka tower

_DL6_L1000051 copy

_DL6_L1000040 copy
The tedium of travel

_DL6_L1000202 copy

_DL6_L1000356 copy
Sole remaining vestiges of nature

_DL6_L1000338 copy
Email girlfriend. Seriously.

_DL6_L1000267 copy


Filed under: Gearhead: Reviews, Leica

Film diaries: The importance of hapatics and tactility, part one

$
0
0

_6001544 copy _7062045 copy

_5010018 copy _7052556 copy


Spot the odd one out of this bunch. (Hint, it’s not the M9-P because the image isn’t low-key, or because it’s the only Leica in a bunch of Nikons.) It’s also not the F2 Titan because it requires no electrons to operate. Let’s try another set:

_5100_DSC1424bw copy _8015800 copy


_8015935 copy _5001717 copy

It’s not the Nikon because it’s autofocus; well, in a way, it partially is. What most of the lenses and cameras in the two sets have in common is a rather nebulous concept generally known as ‘feel’; it’s the impression you get through your hands when you handle and use an object. The odd men out are the D600 and 28/1.8 G respectively – for the simple reason that if you’ve handled any of the others in the group, you’ll feel like there’s something missing: in short, they’ll be the pieces of equipment you’re least likely to want to pick up and use if given free reign. I’ve got three Carl Zeiss lenses for my Hasselblad 501C: the 4/120 Makro-Planar is my least favorite because the focusing ring is a bit stiff and not as pleasant to use as the other two; it’s exacerbated by the long throw making it more of a chore. This is a shame, because optically, it’s the best of the three by some margin – and that’s saying something seeing as all of the lenses are excellent.

The D600, too, falls into this category: it simply feels like a cheap, plasticky consumer appliance when you pick it up. It might have been engineered to take a certain specified amount of punishment before giving up or breaking, but there is something in the way it’s put together, the choice of materials, the feel in the hand…that simply makes you know deep down that you’ll be replacing it in a year or two. This is of course a shame, because there’s nothing wrong with the camera at all: it has an excellent sensor, a comprehensive feature set, solid and accurate autofocus, and a low-vibration shutter that makes for easy handholding at lower speeds. Yet…given the choice of the D600, D700 and D800E in my camera cabinet, I always pick up the D700 or D800E – even if the former might not have sufficient resolution for some tasks, and the latter might be overkill and require extra stable support.

It does seem that in the digital age, manufacturers have largely forgotten how to make cameras that inspired confidence and simply felt right in the hands, making you want to pick them up, feel them, and use them. Even the flagship cameras somehow just don’t feel the same; there’s a solidity to the F2 Titan that’s somewhat diminished in the F6, and completely gone in the D800/D4. I don’t think it’s a weight thing; F2 Titan, F6 and D800 are all in the same ballpark. Heavier doesn’t always feel better; I don’t like the Pentax 6×7 at all, for instance. Maybe it’s down to the thickness of the metal used, or the amount of give, or the choice of leatherette/ rubber. Who knows.

What I do know for certain is that you are far more likely to pick up and want to use a camera that feels good; this in turn means you’ll actually want to go out and take pictures with it, which indirectly could possibly improve the quality of your images through practice*. (This is of course not to say that you can’t make a great image with a lens that feels horrible and plasticky – any of the cheap 50/1.8s are a testament to that.) Interestingly, the lack of choice seems to boil down to cost cutting, as usual. Leica M cameras – both film and digital – have a solidity and heft about them that inspires confidence, even if the film ones are tricky to load, and the digital ones have a habit of eating SD cards. They’re not particularly heavy, either, but they clearly aren’t built to a cost – just look at retail prices these days.

*Oh dear, I seem to have made an (admittedly somewhat circuitous) argument that your camera actually does matter…to be continued in part two!

____________

Visit our Teaching Store to up your photographic game – including Photoshop Workflow DVDs and customized Email School of Photography; or go mobile with the Photography Compendium for iPad. You can also get your gear from B&H and Amazon. Prices are the same as normal, however a small portion of your purchase value is referred back to me. Thanks!

Don’t forget to like us on Facebook and join the reader Flickr group!

appstorebadge

Images and content copyright Ming Thein | mingthein.com 2012 onwards. All rights reserved


Filed under: Articles, Film Diaries, Gearhead: Reviews

Film diaries: The importance of hapatics and tactility, part two

$
0
0

Continued from part one.

_M9P1_L1015791 copy
Some gratuitous camera p***, and one of the nicest cameras I’ve handled – the choice of materials is superb. Too bad the price puts it out of reach for all but the lucky few.

This article falls into the film diaries because historically, there have been many attempts to make cheaper versions of popular cameras – the M2, for instance, is supposed to be a cut-price and simplified version of the M3; the Nikkomats are another example. Yet none of these feel particularly poorly made or roughly finished; if anything, they still considerably exceed the perceived quality level of anything currently available new. Objectively speaking, my 1995 Hasselblad 501C is a pain to use: it’s large, heavy, only carries 12 shots, has serious mirror slap, has a reversed finder, requires a separate external meter (or very good eye), is a pain to reload, slow to shoot with, and an ergonomic disaster – yet somehow I just love making images with it because of the way it feels in the hand. The lens’ aperture and shutter rings move with distinct, clean clicks. The mirror and shutter sound feels positive and deep. The accessories detach and snap into place with solid, positive clicks and zero free play; there are no rough-feeling mechanical parts or actions, and the focusing rings (mostly) have precisely the right amount of damping.

Of more relevance to the reader is that these cameras are available today, often in excellent condition – sometimes hardly used – for not very much money at all. Total cost for the Hasselblad (which is in near-new condition, by the way), with two lenses? Less than a D600 body. And it’s capable of equally good image quality, with the appropriate film loaded. I’m almost sure that the ‘blad will be working just fine – so long as you can still buy 120 film – in another 20 years; I’m just as sure the D600 won’t be. Move up the scale a bit, and you start to get into the more rarefied (at least on price) realm of Rolleiflexes, SWCs, Leica MPs and Nikon F2 Titans; these are at least as well built, and equally solid. The internals of these things are as finely adjusted (though not as well finished cosmetically) as a good mechanical watch. My F2T dates from 1979; it’s been well taken care of – but used – and still looks and functions as new. I’ve got a Rolleiflex on loan from a friend, too – that feels like you could hammer tent pegs with it, or perhaps use it as a chock for a tank on a particularly steep hill. And it would still continue working afterwards. Is it any wonder that whilst modern digital equipment has similar retained value to subprime bonds, film gear seems to have plateaued – or even risen slightly in recent times?

It’s not all bad news, however: it’s clear there’s still a difference between the tactile quality of say a D4 and a D3200. Yet, since we passed the point of sufficiency for most users already – older pro bodies now become a viable option. Used D3s are hovering around the US$2,500 mark; which is not much more than a new D600. (I know which I’d rather have.) Similarly, the premium compacts drop in value like stones; a Ricoh GR-Digital III is a great camera and available around the US$300 mark. Interestingly, Ricoh are one of the few companies that understand the importance of feel: even the buttons on the GR-Digital have a stiffer click and deeper travel than most normal compacts, which helps contribute to the impression of solidity and ‘positiveness’.

It seems that photographers fall roughly into two camps these days – those who care about feel, and those who don’t. Often, the latter simply don’t know any better because they’ve never had the opportunity to handle some really solid equipment, which is a shame, considering how much more accessible say a regular F2 is now than when it was first launched. Even more interesting is that a lot of the former vitriol-throwers change their minds after handling the Hasselblad Lunar in the flesh; it’s clear that the designer (re-designer?) understood the importance of tactility – even if we might disagree with some of the aesthetic choices, and the price point.

The bottom line is that it’s good to have options, even if you might not personally use those options. If there’s enough negative reaction to experimentation or premium products that focus on improved tactility instead of improved functionality – eventually we may well see these options disappear, or be severely restricted. Similarly, the obsession over spec sheets has to end; I’d definitely appreciate perfect button placement or sensible custom functions more than an extra boost of ISO to 512,000 or wherever the current ceiling is now. I can’t help but feel that more effort was spent on things like that in the film era (since the image quality playing field was fairly level) that now; though hopefully this will change in the near future. Camera manufacturers are going to have to start differentiating their product in new ways in order to continue to survive and grow as the markets reach saturation or become jaded; I know I’m definitely yawning a lot more over new camera releases these days. In the meantime, if you haven’t had the pleasure of handling a good film camera – you don’t know what you’re missing; hunt one down even if you don’t plan to shoot with it – some make worthwhile investments, or at worst, have reached price plateaus and are unlikely to devalue any further. At very least, they’re fantastic objects just to handle and display. In some ways, perhaps we don’t care about the result as much; it’s as much about enjoying the shooting experience as the images produced. Now, I’m going to see if I can find a 903 SWC…MT

____________

Visit our Teaching Store to up your photographic game – including Photoshop Workflow DVDs and customized Email School of Photography; or go mobile with the Photography Compendium for iPad. You can also get your gear from B&H and Amazon. Prices are the same as normal, however a small portion of your purchase value is referred back to me. Thanks!

Don’t forget to like us on Facebook and join the reader Flickr group!

appstorebadge

Images and content copyright Ming Thein | mingthein.com 2012 onwards. All rights reserved


Filed under: Articles, Film Diaries, Gearhead: Reviews

Thoughts on the Apple iPhone 5 camera

$
0
0

IMG_2203b copy

Don’t worry, I’m not about to start claiming the various image-processing apps are the best thing since sliced bread; they aren’t. What I am going to do is take an objective look at the iPhone 5′s camera as a tool for photographers. Firstly, we’ve got to remember that the device itself has a lot of limitations: it was never designed primarily to be a camera in the first place, which means a lot of niceties are missing: a dedicated shutter button, for instance. It is therefore important to consider things in perspective, and be realistic about the kind of functionality we can reasonably expect. I reviewed the iPhone 4′s camera here; from the 4S, the camera received a spec bump to 8MP with a slightly different sensor, meaning that the effective focal length of the lens is a somewhat longer 30mm – now five elements and with a fixed f2.4 effective aperture. The new unit is made by Sony, and focuses and shoots noticeably faster than the 4.

IMG_2176b copy

The Good
Where it counts, there’s more resolution; you can clearly see this under daylight conditions and low ISOs. It’s faster, quite noticeably so, in fact. Sony/ Apple claim that there’s up to a two stop improvement in low light performance. Capture speed is fast enough that HDR mode is usable handheld. For us photographers more important is the fact that the semi-spot meter now appears to have a wider adjustment range, meaning less chance of clipped highlights or blocked shadows. Color and auto white balance is far more accurate than the 4; color casts (especially under artificial light) are mostly gone, though clear blue skies don’t seem to have quite the same punch and purity. There’s an auto-stitch panorama mode, selectable grids and now the either of the volume keys default to being the shutter button, but those are products of the OS rather than anything to do with the hardware. Oh, and of course the ability to instantly upload humiliating and compositionally mediocre images remains…or perhaps is made worse, with increased social media integration in every subsequent iteration of iOS.

IMG_2178-9 copy
The very visible effect of HDR mode – not difference in highlights.

The Bad
The ‘claimed’ improvement in low light performance comes at the expense of fine detail. It seems that noise reduction has been cranked up another notch from the 4S, and runs much higher than the 4 by default – and of course being an Apple product, there’s absolutely no way to adjust this. Base ISO is now lowered to 50 instead of 80; the moment the camera increases it to anything above this, you’ll instantly see the noise reduction smearing kick in – it looks rather impressionistic, if you like that kind of thing. I suppose the good news is that at higher ISOs, conversion to B&W results in something reminiscent of film grain in a high-ISO 35mm negative.

IMG_2115b copy
Not particularly dark, but quite a lot of grain – even though the subject was mostly highlight.

IMG_2122b copy
And again, under similar circumstances. That’s not wall texture, that’s noise.

I prefered the gritty luminance noise of the iPhone 4; at least it gave the impression of there being fine detail, even if this wasn’t really the case. Personal preference, I suppose – but at least I can choose to get rid of the luminance noise myself afterwards, or leave it there. And like every other Apple device, you have absolutely no say over the output: aside from the overly strong noise reduction, there are often mild sharpening haloes, saturation and contrast are too high, and the JPEG compression is also quite aggressive – meaning that there’s not a lot of latitude for post processing fixes, either. I don’t think it would be that difficult to offer a few more toggles for contrast, saturation, noise reduction and sharpening, but perhaps I’m oversimplifying the programming required.

IMG_2183b copy
Whole frame

IMG_2183crop
Obvious smeariness due to overzealous noise reduction – clearly visible even here, but if you enjoy this kind of thing, click here for the 100% version

The Ugly
There’s one real problem for photographers: inaccurate framing. Since the iPhone 5′s display got longer, the aspect ratio has changed; the live view preview now doesn’t show the full width of what the camera is capturing; there’s about 10% of the frame missing. As a result, you have to learn to compensate, or be prepared to crop later – which both defeats the point of extra resolution, and is completely inexcusable for a camera which only uses an LCD finder. It’s a rather surprising omission for Apple, and even more surprising that the plethora of ‘expert’ reviews – including DPReview – somehow missed this. I suppose it says a lot about the usual users of this kind of device.

IMG_2161b copy

The device itself
I have to be honest here: I’m really not a big fan of the iPhone 5. It appears that Apple gets every generation slightly wrong on purpose so you’re forced to buy its successor. The original iPhone had great tactile and build quality, and the battery lasted several days but nothing faster than EDGE data; the 3G became plastic but no cheaper, and you had to wait for the 3GS to get decent battery life and speed. The 4 and 4S were superb designs that suffered from antenna issues, and now we’re stuck with a cheap-feeling (but no doubt expensive) device that not only scratches and dents very easily (thank the soft, thin aluminum casing) and can’t seem to hold enough charge to make it through a day. Hell, the home button on the three or four phones I’ve handled isn’t even flush with the screen; there’s a sharp bit that sticks out and catches your thumb. Oh, and did I mention its inability to hold a 3G (let alone LTE) signal for any length of time without dropping? Yes, it’s fast, and operationally mature, but what’s the point of having a portable telephone if it has to be tethered to a wall in order for you to make use of all of its functionality?

IMG_2080bw copy

The only reason I bought the 5 was because my 4 went on the fritz after two years; after barely a month of using it (and being careful of the surfaces it’s put down on, living in a case etc) it looks more beaten up than my 4 did after two years of abuse; I can’t help but feel both slightly cheated and disgusted at the lack of environmental responsibility: this is a disposable device, and feels like one. But I’m sure it won’t be easy to take apart and recycle, nor is it priced like you’d expect to replace it after a year. It simply doesn’t feel like a $800 device – that’s what it costs in this part of the world. In comparison, even Apple’s other devices feel better built – the Mac Mini, Macbook Air and iPads, for instance.

Bottom line: it does what it’s supposed to do, but has enough of those ‘not-quite-right’ niggles that you don’t go away feeling pleased with it. And before somebody suggests another OS, I’d like to suggest trying to get all of your data in various apps out of the Apple universe: short of manual reprogramming, it’s simply impossible.

But I digress: this commentary is supposed to be largely about how the iPhone 5 performs as a camera; the phone part is somewhat secondary, and taken as a given. I suppose the fact that we had to make a diversion to say how poorly it performs in that role isn’t a good sign. Perhaps part of the problem is the hype surrounding the beast; if it was an unbranded phone, at a price not inclusive of its share of Apple’s enormous marketing spend, then chances are we’d marvel at the one or two standout features and just ignore the quirks, or put them down to small-budget development.

IMG_2139b copy

As a camera, it’s useful because you always have it with you, and it’s really not that difficult to use: press the power button, swipe the standby screen up, and you’re in camera mode. Tap to focus and meter, then pick a button to shoot. Done. Under situations where there’s ample light, the camera does its job well and without fuss. It’s fast and responsive, and focuses close enough for people to shoot their food and then be a twit about it. It does the job; use it if you need to, but don’t expect to be wowed by the output. I think half the trouble is that the processing really kills the potential of the sensor; I think if we just had a spot meter and a raw file, you could get some nice B&W images out of it. The first shot in this post is actually a good example: I was driving at the time, and had the phone suction-cupped to the windscreen and acting as my GPS device. I just rotated it a bit and hit the camera button. Certainly wouldn’t have gotten that with the ‘Blad.

IMG_2104b copy

The moment it gets dark, you’ll be wishing you had something with a bigger sensor, faster lens, or preferably, both; though image stabilization of some sort (probably wouldn’t fit inside the phone housing) would go a long way to improving things. I did notice slightly increased sensitivity to camera shake over the 4; I think this is partially due to the resolution increase, but more due to the reduction in weight and resulting difficulty in holding the camera perfectly still. As for the photographic parameters that matter – some control over the development settings, more metering latitude, and ideally, a raw file – Apple remains indifferent, and since the passing of Jobs, seemingly at the mercy of its marketing department. We’re not really asking for anything that doesn’t exist in other devices, or devices with less processing power; (I’m thinking of all the compacts that can put out a raw file, or at very least, a neutral JPEG) instead, we’re getting more of everything that doesn’t matter, and no change in what does. Buy it if you need a new iOS device, but that’s about it. MT

____________

Visit our Teaching Store to up your photographic game – including Photoshop Workflow DVDs and customized Email School of Photography; or go mobile with the Photography Compendium for iPad. You can also get your gear from B&H and Amazon. Prices are the same as normal, however a small portion of your purchase value is referred back to me. Thanks!

Don’t forget to like us on Facebook and join the reader Flickr group!

appstorebadge

Images and content copyright Ming Thein | mingthein.com 2012 onwards. All rights reserved


Filed under: Gearhead: Reviews

A review is not just a review, part one

$
0
0

If it seems slightly odd that I have to write an article like this in the first place, that’s because I’ve been noticing several trends in my email inbox lately:

  1. Why don’t I review XYZ camera, or if I can review XYZ camera?
  2. Why didn’t I test for a particular feature?
  3. Why didn’t I test a particular combination of body and lens or some other accessory/ add-on?
  4. Why didn’t I post full size files, or raw files?
  5. Why do I postprocess the files/ test JPEG output?
  6. Are you paid by the camera companies to write good things?
  7. I read your review of XYZ, but would like to get some more thoughts. What do you think of XYZ?
  8. And of course the usual…”Should I buy X or Y?”

I’m going to add a few to this list myself:

  1. What’s the difference between my reviews and others?
  2. Why do I only review certain cameras?
  3. In the unlikely event I’m given or loaned a piece of equipment to review, then what?

I’m going to address these once and for all, and then return to the business of making images with the occasional detour into the equipment.

Why don’t I review XYZ camera, or if I can review XYZ camera?
For the most part, I have to buy, with my own money, the cameras I review. This means that these cameras must be either of some personal interest to me, or something that I’m going to use in my commercial work. On top of that, one of my camera reviews typically runs north of 3,000 words; those of you in academia or not so long out of university will remember how long it takes to write a researched essay of that length. (For those of you who’ve never tried or forgotten, the answer is that it typically takes me between two and four whole days of work to produce one of these reviews. There’s a lot of testing and re-testing that you don’t see; I need to do this to make sure that I can confidently support my findings.) Add to it the requirement of making pictures that are up to your normal standards with an unfamiliar camera, and you’re quickly into territory that’s going to eat up a lot of time. And time spent writing reviews is time I can’t spend earning money through commercial photography – this is a completely unprofitable activity. Bottom line: I’m simply not going to buy something that I’m not going to use to satisfy somebody else’s curiosity, nor waste time in learning to use it then relating my experiences. Fortunately, I find enough things interesting and use enough cameras that I’ll still produce a reasonable number of reviews.

Why didn’t I test for a particular feature?
Most likely it wasn’t relevant, or I didn’t know it existed. Modern cameras have so many features – a lot of them useless, like ‘pet smile detection mode’ – that it’s impossible to comprehensively test everything. It would also make for a very boring read. As for the key feature I normally overlook – video – this is because I both don’t shoot video, nor do I have sufficient experience to offer a useful opinion. Unlike a lot of other ‘reviewers’, I’d rather not say anything or admit that it’s out of my expertise rather than offer a half-baked and worthless opinion.

Why didn’t I test a particular combination of body and lens or some other accessory/ add-on?
Either I didn’t have access to it, or it didn’t make sense to buy because I’d probably only use it once. Same logic as the first question. If I haven’t said anything specifically about it, then I don’t have enough information to come to a conclusion on it.

Why didn’t I post full size files, or raw files?
Firstly, I won’t post any images unless I consider them up to my normal quality standards. And this means that they have commercial value, which subsequently becomes zero if there are high resolution files available for free in the public domain. Secondly, you’d need to see uncompressed, 16-bit TIFF files on a calibrated monitor to see the same things I’m seeing – which at 80MB+ for high resolution cameras, becomes impractical for bandwidth considerations. Same goes for the raw files – I never release raw files because of both copyright issues, size/ bandwidth and future commercial value. I wouldn’t want to have people posting badly processed versions of my images claiming that they were their own, or worse still, mine. Professional photography is a reputation game, and it’s as much about what you don’t show as what you do – perhaps more so, because it means you know how to throw away a bad image.

Why do I postprocess the files/ test JPEG output?
For similar reasons to why I don’t post full size or raw files. I’m not interested in the raw file output per se, but rather what I can do with the files – whether the potential is there to allow me to achieve what I visualized at the time of capture. This involves application of postprocessing to achieve certain things like local contrast enhancement etc. that are impossible in-camera; if a raw file can stand up to this and deliver the quality of output I’m looking for, then image quality passes. The camera JPEG settings are only of relevance if you have no intention to do postprocessing and are happy with the choices that the camera maker has made, for every situation, and are okay with being restricted to 8-bit compressed files. I’m not, so I don’t bother unless the camera can only shoot JPEG – and even then, chances are a camera like this isn’t of much interest to me anyway because of the typical feature set associated with these things. Bottom line: neither I nor any serious commercial photographer will deliver a raw file or SOOC JPEG to a client because it also communicates a certain carelessness about the whole creative process and quality of output, and I won’t assess a camera on this basis either. Again, finally, I don’t want mediocre or incomplete images with my name associated with them…

To be continued. MT

____________

Visit our Teaching Store to up your photographic game – including Photoshop Workflow DVDs and customized Email School of Photography; or go mobile with the Photography Compendium for iPad. You can also get your gear from B&H and Amazon. Prices are the same as normal, however a small portion of your purchase value is referred back to me. Thanks!

Don’t forget to like us on Facebook and join the reader Flickr group!

appstorebadge

Images and content copyright Ming Thein | mingthein.com 2012 onwards. All rights reserved


Filed under: Articles, Gearhead: Reviews

Major D800/ D800E firmware update (additional: more Nikons, ACR 7.4 final)

$
0
0

_DL5T_L1000927bw copy

Just got an email from NPS: it appears that a lot of the issues with the D800/ D800E have been addressed (note: I didn’t say ‘resolved’, that remains to be determined after testing) in the latest firmware update A 1.01/ B 1.02. The list according to Nikon:

  • Support for the AF-S NIKKOR 800mm f/5.6E FL ED VR has been added.
  • Subject tracking performance in AF-C (continuous-servo autofocus) autofocus mode with framing using the viewfinder has been improved.
  • Gamut for Adobe RGB images displayed in the camera’s monitor has been changed. This enables more vivid display of images.
  • With live view photography in [M] (Manual) exposure mode, exposure preview was always on. This issue has been resolved.
  • In some very rare cases when certain memory cards were used, movie recording would stop, even when the time remaining display indicated remaining recording time. This issue has been resolved.
  • With shooting at an image quality setting of TIFF (RGB) and an image size setting of Small, the right edge of images contained a purple line. This issue has been resolved.
  • In some rare cases, images recorded in JPEG format could not be opened by some software applications. This issue has been resolved.
  • In some very rare cases, colours would change with shooting when white balance was set to a specific colour temperature, as with Preset manual or Choose color temp. This issue has been resolved.

The ones in bold are a big deal. It took them a while, but at least they bothered trying! You can download the updates here from Nikon for the D800 and D800E.

Note – I haven’t tried these yet as I’m in the US and didn’t bring mine, but you can be sure I will be testing it as soon as I return…in the meantime, if anybody would care to share their thoughts, please feel free to do so in the comments. MT

Update: it appears there’s also a major fix for the D600, minor ones for the D4, D3, D3s, D3x, D3200 and D7000

ACR 7.4 / DNG Converter 7.4 and Lightroom 4.4 final releases are also available; looks like they’ve also added Coolpix A support – which is great as I’m getting mine on Thursday…

____________

Visit our Teaching Store to up your photographic game – including Photoshop Workflow DVDs and customized Email School of Photography; or go mobile with the Photography Compendium for iPad. You can also get your gear from B&H and Amazon. Prices are the same as normal, however a small portion of your purchase value is referred back to me. Thanks!

Don’t forget to like us on Facebook and join the reader Flickr group!

appstorebadge

Images and content copyright Ming Thein | mingthein.com 2012 onwards. All rights reserved


Filed under: Gearhead: Reviews

A review is not just a review, part two

$
0
0

Continued from part one.

Are you paid by the camera companies to write good things?
No. I wish, because it would reduce the amount of hostile email and messages I get. If anything, my relationships with most camera companies are quite strained because it seems that they expect you to write good things about their cameras if you’re given the ‘privilege’ of a loaner. This is one of the reasons I prefer to buy my own equipment as I can remain as objective as possible; regardless, I’ll do so anyway, even though it means that there are probably marketing/ sales people at every camera company here who don’t like me. What they don’t seem realize is that in the long run, a lack of objectivity means that nobody will believe what you say anyway. Since writing the last article on this subject, it seems general degradation in the business side of things has meant increased sales aggression, and frankly, a degree of hostility towards objective reviews at a time when perhaps the companies need it most; this is incredibly shortsighted on their part (and perhaps indicative of a fear that your product is really crap), but then again, if you can’t see past your next year end bonus anyway, who cares?

I read your review of XYZ, but would like to get some more thoughts. What do you think of XYZ?
This is perhaps the most stupid and annoying question that I get asked on a regular basis. I’m not going to have anything more to say than I’ve already written in the review, which was a carefully written, considered and very time consuming exercise. Perhaps attending some English language classes might help: re-read the question you just asked me…

And of course the usual…”Should I buy X or Y?”
First, read my article on sufficiency. Then play with the choices in person, and buy whichever one you like the best. It isn’t the camera that’s going to make any difference to your images. This isn’t to say that you might produce better images with a given camera because you like it better and thus shoot with it more, get more practice and subsequently improve, it’s that there’s not so much difference in ultimate best-case image quality that most people will be able to tell the difference, let alone consistently extract it.

What’s the difference between my reviews and others?
Firstly, experience. Between my current career as a working professional commercial photographer, and my previous career as a editor of a photography magazine, I’ve used a lot of gear. That means I’ve got a large basis for comparison. My primary objective is to produce great images, keep clients coming back and attract new ones,  which means that output quality and consistency are paramount; everything else is secondary. I’ve said it before and I’ll say it again: look at the quality of the sample images as a litmus test to the validity of the statements of the reviewer. I’m not inclined to trust somebody who shows crap samples, clearly has no pride in their own work then makes pronouncements one way or another. It speaks of a lack of quality control and discipline. Secondly, objectivity: I’m not paid by the camera companies (and some actually don’t like me), so I’ll say the truth: if it’s great, I’ll say it’s great. If it’s crap, I’ll say it’s crap. If it’s really crap, I probably won’t even review it in the first place.*

*Case in point: I recently had a Panasonic GH3 on loan. There were enough operational/ usability issues with it that I actively disliked using it to the point that I didn’t want to review it. Image quality is great – it has the same sensor as the OM-D – but if you care about the viewfinder, UI, or the way your camera feels in the hand, then I really don’t have anything good to say about it – especially not at the price they’re asking.

Next, I’m a physicist by training: this means I’m schooled in the scientific method and do testing in a repeatable, objective way. If there are results that are unexpected, I’ll repeat the tests to make sure it’s not an error I caused. If there’s really a problem, I’ll try to get hold of other samples to test for the same behaviour. I don’t make conclusions based on a single observation, unlike other reviewers**. Sample variation happens, and quality control in these days of consumer disposables seems to be optional, and it’s quite possible that what was observed was not typical behaviour of the group as a whole.

**Thom Hogan implied I was jumping to conclusions with the D800′s AF issues and that everything was fine – even though I documented testing half a dozen bodies and about twenty lenses, and finding problems in almost all combinations therof, before subsequently coming to the same conclusion himself. This is a good example of both lack of objectivity and eating one’s own shoe.

Finally, I do this – the site, the articles, the reviews – because I want to, not because I’m paid to. If anything, quite the opposite: I have no interest in doing any of this work other than personal satisfaction; time spent writing and testing cameras is time I can’t bill clients for. Please keep that in mind before writing me a demanding email; I doubt very much you’d entertain similar requests of your own time.

Why do I only review certain cameras?
See my answer to the very first question.

In the unlikely event I’m given or loaned a piece of equipment to review, then what?
This has happened a few times in the past. The same conditions apply: I will only write the review if I can be objective about it and have full editorial control over the content; I will disclose that I’ve been given or loaned the equipment, and finally, I’ve also declined many of these requests simply because whatever was offered wasn’t interesting – either to me, and probably not to you, either.

Ultimately, there are hundreds, if not thousands, of review sites out there. Most are are a regurgitation of the spec sheet in the press kit. Some are template copy-paste with a few formulaic lines inserted here and there (this is how some people manage to have a ‘review’ of everything even before it’s commercially available). Yet others are test charts and step wedges and studio scenes and high-ISO series and A-B comparisons. Few claim to be ‘real world’ reviews, but lack objectivity and the quality of output. Fewer are reviews written by people whose cameras are critical for making a living, and small differences matter. Finally, the number that are practical, comprehensive and objective tests by working pros with a good variety of images of sufficient quality to support the conclusions can be counted on the fingers of one hand… MT

____________

Visit our Teaching Store to up your photographic game – including Photoshop Workflow DVDs and customized Email School of Photography; or go mobile with the Photography Compendium for iPad. You can also get your gear from B&H and Amazon. Prices are the same as normal, however a small portion of your purchase value is referred back to me. Thanks!

Don’t forget to like us on Facebook and join the reader Flickr group!

appstorebadge

Images and content copyright Ming Thein | mingthein.com 2012 onwards. All rights reserved


Filed under: Articles, Gearhead: Reviews

Quick first thoughts – Nikon Coolpix A and Fuji Finepix X20

$
0
0

_5020841 copy

I recently picked up review units of the Nikon Coolpix A and Fuji Finepix X20 at B&H – the store itself is an incredible experience for any photographer, by the way – after a few days of intense shooting during my Making Outstanding Images workshops, I’ve had a chance to put together a few quick thoughts on the two cameras. I will be doing more complete reviews once I get a chance to shoot further with them and pore through the hundreds of images. Until then, this should tide over the curious.

Let’s start with the Fuji X20*:

  • Build quality appears to be a notch up from the X10 I handled: everything that appears to be metal, is. It’s cold to the touch and doesn’t seem to have the thick paint I remember my X100 having. It’s a very high-quality item. 
  • Focusing is fast and accurate. The phase detect sites added to the sensor do really make a difference; this is one of the fastest compacts I’ve used in that regard.
  • It’s a really enjoyable camera to handle and shoot with; very tactile and the controls operate with solidity. Everything is snappy. You can’t shoot it one-handed, though: no way to use the zoom ring. And it isn’t really pocket friendly, either.
  • The JPEGs are still excellent…ACR has improved RAW processing from the XF1, but they’re still very noisy and a little soft.
  • Image quality-wise, the sensor appears to be the same or very slightly better than the XF1 (they’re both 12MP, 2/3″ types). I think ISO 800 is the cutoff point for clean images. 1600 is usable in a pinch.
  • You have to be careful with DR auto: it will pick much higher ISOs than required in an attempt to retain highlight detail, though this appears to only increase noise in RAW. I’ve got some poor images in bright sunshine from the first day because the camera chose ISO 400 instead of the base 100; my recommendation is to leave it on DR100 and use the spot meter instead.
  • I’m not using the OVF as much as I thought due to very poor (75-80%?) frame coverage. However, it does have very helpful shooting info and AF point overlays – too bad they’re not that visible.
  • IS is very effective.
  • At a guess, battery life is about 350-400 frames per charge – not bad considering how tiny the battery is.

Many of you are wondering why I didn’t review the X100s; with the 28mm converter it would make a much better comparison against the Nikon Coolpix A. The simple answer is – I requested one, but none were available. I’m still curious about this one and will try to get one to review in the future as soon as it is available. The only downside I see is that it’s rather large; enough so that I might as well have a second OM-D. To me, this rather puts it out of the running in the pocketable category.

The following series was shot with the X20 in Midtown New York City:

_X20_DSCF0045 copy

_X20_DSCF0225 copy

_X20_DSCF0176 copy

_X20_DSCF0122 copy

_X20_DSCF0046 copy

And now the Coolpix A:

  • Build quality is similar to, or perhaps slightly better than the X20; spatter-paint finish black magnesium, with a similar feel to the pro DSLR bodies. (Both are made in Japan) 
  • The menu system and UI logic are identical to the DSLRs – a very easy transition, for the most part. Unfortunately, some of the more questionable decisions carry over too – the inability to zoom in to the focus point with the OK button, for instance; redundancy of the second control dial in anything other than M mode, for another.
  • Focusing isn’t as fast as the X20, or the OM-D I’ve also got with me. It’s about the same as the Ricoh GR-Digital III, I think. But unlike the GRD III, it doesn’t remember the manual focus distance when switched off, nor does the distance scale also have a depth of field scale. These two minor changes would make a HUGE difference to speed – just shoot it zone-focused; an 18mm real focal length is ideal for this. Actually, I could live with just the former…at least the manual focus ring is sensibly geared, though.
  • Everything else about the camera is blazing fast – startup time, burst mode, writing, reviewing, menu navigation…
  • The bit you’ve been waiting for: image quality is stunningly good; slightly better than the D7000, not quite as good as the D7100. Probably about on par or slightly better than the OM-D. ISO 3200 is not too bad, and ISO 6400 usable in a pinch. The files have lots of latitude and are handled well by the latest versions of ACR.
  • The camera really needs VR; on a windy day, 1/50s or higher is required for critically sharp images at 100%.

The following series was shot with the Coolpix A in Midtown NYC:

_A_DSC0182 copy

_A_DSC0200 copy

_A_DSC0178 copy

_A_DSC0149 copy

_A_DSC0116 copy

And a 100% crop from the previous image:
_A_DSC0116-crop

Personally…I’m still trying to decide which one to keep to replace the Sony RX100 – these are big (small?) shoes to fill, but it appears that there is no Goldilocks camera – in every case, there’s a tradeoff of some sort. The RX100 doesn’t focus close and has a rather slow optimal aperture for maximum image quality, but this is offset by a sensor that is happy even at ISO 3200 and has fantastic resolution. It’s also the smallest of the bunch. The X20 has the weakest image quality by some margin and is neearly as large as an OM-D, but it’s also the most fun to use, has a built in optical finder, mechanical zoom, a mechanical exposure compensation dial, and the fastest and most accurate focusing. The Coolpix A leads the pack on image quality and UI, but lags on focus speed and VR/IS. I think the dissonance comes from what I think I want (small, fast prime, high IQ, fast AF, optical finder) vs. what I actually tend to use (small, flexible lens range, taking my time to frame and shoot precisely using the LCD, high IQ). Honestly, perhaps the trouble is I like them both – but for different reasons. My heart says ‘buy both’, my wallet says ‘pick one’. Choices, choices…MT

The Fuji X20 is in stock and available from B&H or Amazon; the Nikon Coolpix A is available here from B&H or Amazon.

____________

Visit our Teaching Store to up your photographic game – including Photoshop Workflow DVDs and customized Email School of Photography; or go mobile with the Photography Compendium for iPad. You can also get your gear from B&H and Amazon. Prices are the same as normal, however a small portion of your purchase value is referred back to me. Thanks!

Don’t forget to like us on Facebook and join the reader Flickr group!

appstorebadge

Images and content copyright Ming Thein | mingthein.com 2012 onwards. All rights reserved


Filed under: Gearhead: Reviews
Viewing all 188 articles
Browse latest View live